Showing posts with label China Glaze. Show all posts
Monday, May 26, 2014
Pastel Rainbow Gradient
Hello, hello! Two posts in a row?! Holy cow, maybe I'm getting back into the swing of things lol Anyway, I have a pretty pastel manicure to show you all today. I originally saw a manicure like this over at The Swatchaholic that she did with some Illamasqua pastels and I knew eventually I was going to have to give it a try!
Since I don't own Illamasquas as yet, I did this look with 3 of the colors from NYC's City Bloom collection: Sunset Park Pink, Mimosa Bouquet, and Robin's Egg Blue. To round out my rainbow, I added China Glaze In a Lily Bit and Sinful Colors Skylark. I'm absolutely loving how this turned out!
To create this look, I started with 2 coats of Sinful Colors in Snow Me White as a base since the pastels are quite sheer. Then I just did the normal gradient procedure (for a great tutorial, check out The Nailasaurus) but flipped the sponge so that the gradient goes from side to side, rather than top to bottom of the nail. Super easy!
I had wanted to add some sparkle on top of this but, alas, my first sparkle attempt kind of ruined the manicure so I scrapped it. It was lovely all on its own though! The City Bloom collection is currently available for $1.99 each. I found mine at CVS and I believe you can get them at Rite Aid and Kmart as well. Be sure to double check the display, the one at my CVS had $1 off coupons for any of the polish and makeup in the City Bloom collection. Screamin' good deal!
Thanks so much for reading!
Friday, May 23, 2014
Summer Chevrons Manicure
Hi there! I hope you are all gearing up for a great weekend! I've got a quick manicure to show you all today. I seem to be stuck on chevrons as this is the second mani in a week I've done that includes them. There's just something about the zig-zaggy pattern that really appeals to me.
I started with 3 coats of Sinful Colors On The Bright Side, a peachy orange creme. It's actually showing up here more yellow than in real life. The formula was ok on this, but I did have some difficulty with streakiness so I can't give it full marks.
I used Sinful Colors Snow Me White for the chevrons and you can see my tutorial on creating chevrons with tape here. They're quick and so easy to do! China Glaze in Mingle With Kringle rounds out my mani on my middle nail.
All in all, this is a fun summer look that can be done with any color combination! Thanks so much for reading!
Friday, June 28, 2013
China Glaze Shell-O
Hi, there! Super quick post today...I'm headed out for work in a few minutes. I'm a little nervous about this because I'm headed to Grant Park to help set up our booth for a show this weekend. Grant Park is where the Blackhawks held their rally today. They still don't know how many people showed up for it, but it looked like more than the amount that showed up for Obama's rally in 2008! In any case, go 'Hawks! Great job on bringing Stanley home :)
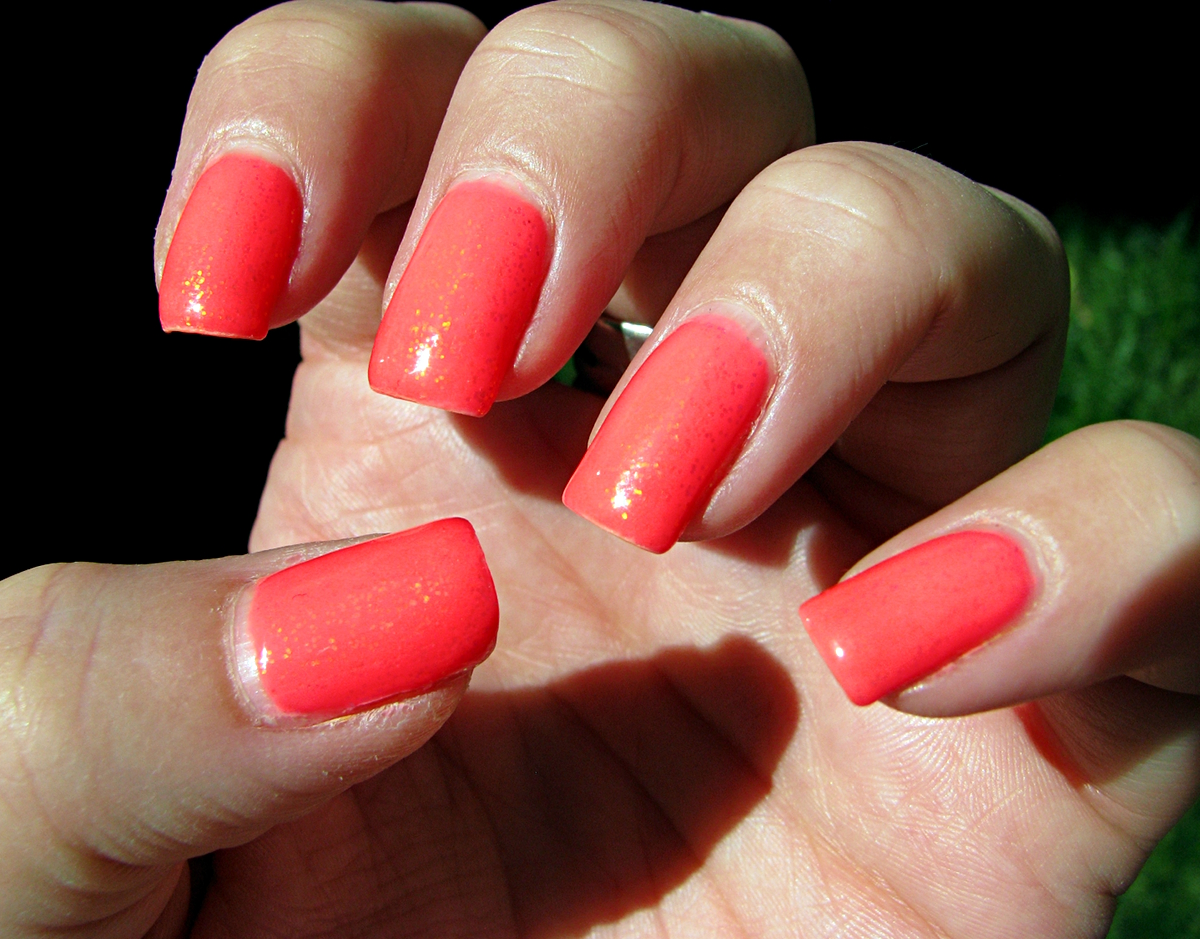
On to the nails! I picked up a bottle of China Glaze in Shell-O a few days ago. China Glaze's 2013 Sunsational collection is split into cremes and jellies. Shell-O is from the jelly half.
First off, I LOVE the color. This photos show it as a touch more orange than it actually is. Neon brights like this always make my camera go haywire, but these really aren't too bad. Shell-O is super, super sheer. I'm showing 5 (!) coats here and I've still got a bit of visible nail line.
From what I've read, most of the jellies in this collection are like this. So if you aren't patient, don't buy them lol
Now, as my boyfriend will tell you, I just can't leave well enough alone. A single color all by itself on my nails? No way! So I jazzed it up a bit :)
I decided to sandwich 2 coats of Kleancolor's Chunky Holo in Candy between layers of Shell-O. As you can see, Candy gave this manicure a lovely golden flash in the sunlight and a nice depth in other light. A perfect summer combo!
Thanks so much for reading!
Tuesday, June 11, 2013
ABC Challenge: W is for Woven Nails
Hi there! It's a late night here in Chicago and I should totally be in bed, but I just had to get my ABC Challenge post up. Can you believe it's 'W' this week already?? Only 3 letters left, folks! 'W' was one of the letters I've had planned for awhile (wish I could say the same for 'X'!). Back in school, I took a few weaving courses and found out that I really enjoyed it. I even bought myself a tabletop loom after graduation. I haven't used it in awhile so my skills are a bit rusty, but I hope you'll like what I've come up with for this week's Challenge. I give you...Woven Nails!
I started with 2 coats of Sinful Colors in Unicorn. Actually, this manicure started last night when I painted a ziploc bag with 2 large squares of China Glaze in Sunday Funday and Sinful Colors in Island Coral. Those squares became, after they dried and were cut, the strips of polish I used to create the woven patterns on my accent nails here. It's similar to what I did for my Viking manicure, only with less detail and more aggravation lol I had planned to weave the pattern off the nail and then place the whole thing on while Unicorn was still tacky. However, after a couple of tries, I found that placing the strips directly on my nails and weaving as I went worked better.
After admiring my work, my bf kindly pointed out, "They look prettier than I thought they would...but it took you 2 hours to do 2 nails!" Oh, boys! They just don't get it!
Please take the time to check out the other ladies' posts this week. You can find them via the thumbnails below. Thanks so much for reading!
Tuesday, March 26, 2013
ABC Challenge: L is for Lace Nails and a Surprise
Hello, hello! It's time again for another ABC Challenge post. This week's letter is "L" and I decided to try something I haven't done before; Lace nails. There are a few ways to reproduce the look of lace on your nails, including using actual pieces of lace glued to the nail. I chose to go in a different direction with mine. Take a look:
I painted the lace directly on to my nail here. I started with 2 coats of Spontaneous by China Glaze, a dusky lavender creme. Then, using a dotting tool (which I found at Ulta, Essence brand, I believe it was $1.99), I started applying the lace pattern using China Glaze's Sweet Hook, a pale lilac creme. I got both of these polishes in one of China Glaze's ombre kits, on sale at Sally's now for $12.99. These kits are kind of nice because they're a good deal, 4 polishes for under $15.
I'm not sure I'm in love with this manicure or not. It was a good idea, but I don't feel like I executed it very well. My dots got a little gloppy and you can see the texture coming through from that on my tips. But the colors are pretty and it was good dotting practice, if nothing else :)
Now, on to the surprise! In celebration of the fact that I've hit 10,000 page views on my blog, I'm doing a giveaway! And not just one giveaway, but two! That's twice the fun! I have two sets of three Sinful Colors polishes for two lucky winners. You may remember a couple of weeks ago I mentioned that I'd picked up a couple extra bottles of SC during their $0.99 sale, including several bottles of Green Ocean. Well, the time has come to pass them along!
Prize #1 is a set of 3 Sinful Colors polishes. From left to right, Dream On, Green Ocean and Star Dust.
Prize #2 is a set of 3 Sinful Colors polishes. From left to right, Savage, Green Ocean and Super Star.
The rules for the giveaway are pretty straightforward. You need to be a U.S. resident to enter and must be 18 or over or have your parents' permission to enter. You need to be or become a follower of my blog and you need to leave me a contact email so I can get in touch with you if you win. The giveaway is open for a week, at the end of which, I'll randomly select two winners. If your name is drawn, you'll have 48 hours to contact me with your shipping info. After 48 hours, unclaimed prizes will have a redraw and a new winner will be selected.
a Rafflecopter giveaway
Good luck in the giveaway!
Please stop by and check out the other ladies participating in the ABC Challenge! You can find them via the thumbnails below! Thanks so much for reading!
Thursday, January 31, 2013
Navy + Nude Gradient Manicure
Howdy all! Welcome to my new followers, I seem to have picked a couple up over the last couple of weeks. Glad to have you on board!
Today I've got a fun little gradient for you. I saw a similar look earlier this week on Ermahgerd Perlish! and I loved the effect! Check out her post here for the original version. And check out my pics below to see what I did :)
....more after the jump....
Friday, December 14, 2012
Silver and Gold Manicure
Howdy, everyone! Ah, Friday...the beautiful beginning to the weekend. That is, if you have a job wherein you aren't required to work weekends...I have such a job. But, at least it's a fun job!
I've got another holiday manicure for you today. This one is super sparkly and packed with holo goodness. Take a peek:
Silver and gold and glitter and holo, oh my! I started this manicure by just swatching 3 coats of China Glaze Angel Wings and Glistening Snow. These two polishes are part of China Glaze's 2012 Holiday Joy Collection and both are micro-glitters with a holographic punch. Angel Wings is the gold and Glistening Snow is the silver. Both of these applied easily with decent coverage on the second coat. Initially, I was going to leave this manicure as just the two polishes on alternating nails, but why stop there? I ended up doing glitter gradients on each nail. I paired O.P.I.'s Servin' Up Sparkle, a silver micro and hex holographic glitter in a clear base, with Angel Wings while Glistening Snow matched up with e.l.f.'s Gold Star, a large hex glitter in a clear base.
Here's another view:
I may have a holiday party to go to Saturday night, so I'll be sporting this glitter-fest because I think it's just perfect! What do you guys think?
Thanks so much for reading!
Labels:
Angel Wings,
China Glaze,
e.l.f.,
Glistening Snow,
glitter,
gold,
Gold Star,
holiday manicure,
holiday nails,
holo,
holographic,
holographic glitter,
manicure,
nail polish,
nails,
O.P.I.,
Servin' Up Sparkle,
silver
Wednesday, October 3, 2012
Happy Accident
Howdy everyone! We're halfway through the week, how's everyone feeling? If you're like me, you can't wait for Friday. I actually have the day off Friday and I'm thinking I might go get a massage. I received a gift certificate to a local spa for my birthday from a friend and I'm thinkin' it might be time to cash it in.
I wanted to put up some photos of my nails today. This is a good example of how mistakes can often become happy accidents. I was trying out a new stamping plate and instead of getting the whole design, I only got a partial. At first I was frustrated, but then I decided I like the abstract feel of the partial stamp anyway so I stamped all my nails that way. Here's how it came out:
I started with 2 coats of Peachy Keen by China Glaze (another from my weekend Ulta spree) and stamped over top with Luxe from Orly. Luxe is my favorite gold of all time. It reminds me of the look of gold leaf or foil and the effect is just marvelous. I thought the color combo worked well here, too. It reminds me of that marble with the gold veins running through it. So you can see the original pattern of the stamp was a bunch of stars. I'll give this pattern another try with a thicker polish and see if I can get a clearer outcome in the future, but as far as oopsies go, this turned out alright.
I'll be posting my first manicure for the Nail-aween Challenge tomorrow so be sure to stop by and check it out! Thanks for reading!
Monday, October 1, 2012
31 of 31: Recreate a Favorite Manicure
Howdy, all! Well, it's finally the end. The 31st day of the 31 Day Nail Challenge has arrived. I'm a little sad that it's over, but mostly I'm just relieved (and a little proud) that I made it all the way through! Today's challenge was to recreate a favorite manicure. I have lots of favorite manicures done by other bloggers. There are so many great ones out there. I knew I wanted to try my hand at stamping some more and I knew I wanted something simple. Let's face it, I'm exhausted after doing all these manis every day! So I chose a sweet stamped manicure from pshiiit.com's blog. I'll include a photo of her's at the end. I'm unable to find the original post for this manicure, every time I try to link back through Pinterest it just takes me to her home page. Here's my version:
I started with one coat of China Glaze in First Mate and then used Wet 'n' Wild's Wild Shine in French White Creme to stamp a swirly heart design on top. This set of stamping plates worked a lot better for me, so I'm finding that not all plates are created equal. I did have some trouble with my top coat on this one. My bottle of Seche Vite needs to be swapped as it's getting kind of gloppy. Here's another view:
And here's the original:
As you can see, my stamp is not exactly the same as her's but I still think it turned out pretty well. I had a lot of fun with this challenge and I'm glad I followed through with the whole month. I'm not in a rush to do it again though lol However, I will be participating in a Halloween Challenge for the month of October. Check back for more info on that soon. Thanks so much for reading!
Thursday, September 20, 2012
20 of 31: Water Marble Nails
Howdy, everyone! We're 2/3 of the way through the 31 Day Challenge already, can you believe it? I really can't...amazing how time flies when fun is being had! Day 20 brings us water marbling. Everyone loves how a water marble looks and pretty much everyone hates doing them. I'm no exception. In fact, I'll let you in on a secret...I cheated this time! I figure if I can get the same look from an easier technique then I'm goin' for it! I did a faux water marble or dry water marble (you can read about that technique here) to save my sanity and I think it turned out pretty well. Have a look:
I started with 2 coats of Sinful Colors Jungle Trail as a base color. Jungle Trail is a light grey creme. To do the marble, I used Jungle Trail again as well as China Glaze Secret Peri-wink-le (a light blue creme) and First Mate (a deep navy creme) and Wet 'n' Wild Wild Shine in Sunny Side Up (a sherbert orange creme). After everything dried under a coat of Seche Vite, I went back in with the point of a cuticle stick and Sunny Side Up and First Mate to create the dots. The dotted water marble is a manicure that I've been seeing around on Pinterest (although nothing is ever linked back so I'm not sure who to credit for it) and is such a great easy way to change the look of the marble. I love the way this turned out, everything from the color combination to the pattern is just fantastic!
Tune in tomorrow to see a color inspired mani and thanks so much for reading!
Monday, September 10, 2012
10 of 31: Gradient Nails
Howdy! I'm a little late posting this, but oh well. I figure the manicure was worn the whole day of Day 10, so it counts, even if I'm posting it 10 minutes after midnight ;) Today is Gradient Nails and here's my version:
I started with 2 coats of Ulta's Magnetic polish in Put a Ring on It, a dusty rose polish with blue iridescent glitter. Then, I taped off my nails in the middle and did a gradient from tip to cuticle using China Glaze Magnetix in Instant Chemistry, a dark maroon. I reversed the gradient for the other half of the nail and then used a coat of non-fast drying top coat to reactivate the magnetic polish to create the diagonal lines. This didn't turn out as well as I'd hoped it would, but I'll give it an "A" for effort.
Next up is polka dots so check out tomorrow's post! Thanks for reading :)
Tuesday, August 21, 2012
Scalloped Jelly Sandwich Manicure
Howdy, everyone! I know it's been a few days since my last post and I'm sorry for that. I've been working some extra hours this week so I've been too pooped when I get home to post! But I do have something new for you today. Here's where I started with this one:
So I finally broke down and bought a bottle of Revlon's Royal at Ulta last week. I've been coveting it simply forever and, even with their copyright issues, I just had to have it. So here, I applied one coat of Royal, followed by a coat of China Glaze's Ray-diant and then another coat of Royal to make a lovely jelly sandwich. Royal really is a beautiful polish...but, boy! does it stink! Is it just my bottle that smells kind of like feet? lol
Anyway, after wearing this for a day, I decided to jazz it up a bit, and here's the result:
I loved my Scalloped Manicure from the other day so much, I decided to try it again. This time, I used Orly's Luxe over top and doesn't it look fabulous!? I love, love, love this color combo! And I think the glitter peeking through the blue just adds a little something extra. Whaddya think?
Labels:
blue,
China Glaze,
glitter,
glitter sandwich,
gold,
jelly,
jelly sandwich,
Luxe,
manicure,
nail art,
nail polish,
nails,
Orly,
Ray-diant,
Revlon,
Royal
Sunday, August 19, 2012
Scalloped Manicure
Howdy, everyone! Just a really quick post, as I'm headed out the door for brunch at one of my favorite spots!
This is 3 coats of Unicorn by Sinful Colors, allowed to dry and used my craft scissors to cut up some scalloped pieces of tape. Placed the tape and then applied a coat of Secret Peri-Wink-le by China Glaze. This photo isn't a great representation of the colors. The China Glaze has a bit more purple to it, but at least you can see the design. I'm lovin' this one! Can't wait to try with other colors and maybe with more colors on the nail together.
Be looking out for some great new manicures at Over The TopCoat! I made another Ulta run on Friday and then, Saturday at work, a fantastically giving customer brought me some her own polish stash as a gift! All in all, I think I have about 25 new shades to try out...it'll be a very exciting week for me!
Thursday, August 9, 2012
China Glaze Luxe and Lush
Howdy, all! Just a quick post tonight. I have a bunch of work to do before I can go to bed...including a new manicure after I take this one off! So, without further ado, here's what I've got on now.
I am so sad that there was no sun for outdoor photos today! I have a feeling this mani would have just lit up in sunlight. I had to content myself with taking indoor pics. I've decided in addition to the new camera I need, so better indoor lighting is also going on the "want" list. Anyway, back to my nails! I started here with one coat of CoverGirl NailSlicks in Midnight. This is an OLD bottle I've had for just about ever. I'm surprised the formula is still in decent condition! Midnight is gunmetal metallic-y glitter in a black base. The bottle describes it as sheer, but one coat is usually enough to cover for me. On top of that, I used one coat of Wet 'n' Wild's Fergie in Rock 'n' Roll. My final polish is China Glaze's Luxe and Lush from their Hunger Games collection. This was another score from my Ulta trip the other day. I've been looking for a bottle of this and was lucky enough to find it in their clearance section for $4.99 marked down from $8. Yay! Luxe and Lush is a flakie topcoat...the flakes are irregularly shaped and flash every color of the rainbow. I am so happy to have this in my stash!
After wearing this with a coat of Seche Vite, I decided to matte it out with Essie's Matte About You to see how it looked. Normally I love matte flakies, but I'm not wild about how this turned out. Maybe it's the metallic glitter underneath that's not working for me. Oh well, you win some, you lose some. I'm quite positive it will also take me about an hour to get all those different layers of glitter off my nails tonight lol
Thanks so much for stopping by!
Labels:
black,
China Glaze,
flakie,
glitter,
gunmetal,
luxe and lush,
manicure,
nail polish,
nails,
silver,
sparkle
Monday, July 16, 2012
Sun Worshiper Glitter Sandwich
Howdy, everyone! It's been a bit of a crazy day today. I just found out the apartment upstairs got broken into and robbed, or burgled, or whatever they call it. Always a little scary when crime hits so close to home. Fortunately, no one got hurt physically, although I know the emotional trauma is just as bad. It seems like it might have been more of a domestic thing, and maybe my neighbor knows who did it, but I'll be double-checking my door locks extra carefully now!
On to happier topics, my manicure! I must warn you, this polish is a neon and it truly lives up to the name. So you may want to don your sunglasses before you check out the pics!
Behold, China Glaze Sun Worshiper! A very, very bright orange neon...this one will knock your socks right off! As I was perusing my polish collection earlier today, I knew I wanted to try something sunny and Sun Worshiper definitely fit the bill. After I put the first 2 coats on my nails, it occurred to me that the finish on a neon polish was pretty similar to a jelly, which got me thinking that I could probably do a glitter sandwich with a neon and it would look pretty much like a jelly sandwich. And, you know what? I was right! I actually used 3 coats of Sun Worshiper and then applied a thin coat of Julep's Oscar, a small gold glitter in a clear base, followed by a dab of Milani's Jewel FX 531 Gold, a larger hexagonal glitter in a clear base. Then I swiped another coat of Sun Worshiper over the top and sealed with Seche Vite.
This manicure in the sunlight is so bright, it makes my eyes hurt. My poor camera just can't capture the tear-inducing shade of polish, but it's done the best it can.
Friday, July 6, 2012
Kleancolor Bluebell
Howdy all! Just a quick post this evening, cuz it's Friday and I know most people have better things to do that sit around and read nail blogs :)
I have another Kleancolor swatch for you today. Post-swatching, I decided to add a little something extra on top. Here it is:
This is 3 coats of Kleancolor Chunky Holographic Bluebell over 2ish coats of China Glaze First Mate. Bluebell is a small, green to orange holographic glitter in a clear blue tinged base. I love the colors in this one! I decided to go back over top of the glitter and add some stripes of First Mate to finish this manicure off. I've got vertical, horizontal and diagonal stripes going here, lots of fun!
Labels:
China Glaze,
chunky holographic,
glitter,
gold,
green,
holo,
holographic,
iridescent,
Kleancolor,
manicure,
nail art,
nail polish,
nails,
orange,
polish,
stripe,
stripes
Wednesday, June 27, 2012
Colorful Jelly Sandwich Manicure
Howdy all! I hope everyone is having a great week so far. I am so excited about today's manicure that I just want to get right to it. Remember this manicure I did the other day? Today's mani is kind of like that one's more colorful cousin. Alright, here we go!
Isn't it so pretty? Sorry for all the photos, but I love this one so much! The nude glitter sandwich from the other day reminded me that I needed to try different color combinations. And, I must say, this manicure has made me finally fall in love with jellies. There is just something about their translucency that is just so beautiful, you can't help but love 'em!
For this one, I started with 2-3 coats of China Glaze Ride the Waves alternating each nail with 2-3 coats of Sinful Colors Dream On. After those dried, I brushed on Wet 'n' Wild's Beautiful but Dangerous glitter which has fuchsia and bright blue square glitter mixed with gold and black smallish hexagonal glitter. I decided I needed some other sizes of glitter so I spot coated on some O.P.I. Servin' Up Sparkle; tiny holographic and larger hexagonal holographic glitters in a clear base. After all the glitter dried, I added another coat of Ride the Waves on the blue nails. On the pink nails, I initially did another coat of Dream On, but it dried a little too thick, so I swapped it out for Wet 'n' Wild's Fuchsiarama which is more of a true jelly. I ended up using 2 coats of Seche Vite plus a coat of Jessica Brilliance (my SV ran out!), even with the jelly on top, the glitter was a bit of a piggy eating up my topcoat.
Friday, June 15, 2012
China Glaze-Ride the Waves
Hello and happy Friday! It would have been a happier Friday if I was at the park watching a movie with my friends as I planned to be. However, the CTA decided that was not to be. I waited for a half an hour for the bus, checking on it via text for that whole time, only to learn it wasn't coming. I still could have made it to the park, but by then, I was in a horrible mood and was all hot and sweaty. All I could think of was my couch, so I just headed home. Not an auspicious start to the weekend at all. Hopefully, tomorrow will be more cooperative.
In any case, I hit Sally's yesterday and picked up a few new polishes and I have one to show you!
This is China Glaze Ride the Waves from their Summer Neon Collection. It. Is. Gorgeous. End of story! From the top is an indoor shot, a shot in the shade and a shot in the sun. Looks pretty good from every angle, yes? I have to admit when I started applying this, I was a little disappointed because it's pretty dark, almost navy, when wet. It didn't look anything like what I'd hoped it would until it dried and I got a top coat on it. Then it was love! The formula was nice and applied easily. It's kind of a like a jelly, but not exactly. I'm wearing 3 thin coats here...you can kind of see the nail line if you look closely, but not enough to bother me.
And, because I couldn't possibly leave the house with just a single color of polish on my nails, I had to bling it up a bit.
I used the flowers from Cina's Midsummer Dream nail art kit and the glittery flower shapes from their Champagne Toast kit. It's a nice touch for a summer manicure and the yellow and orange colors over the blue makes a nice contrast.
So, I'm determined to have a better evening than how it started out. I think I'll chill out on the couch and watch Say Yes to the Dress. I love that show even though I have no real desire to get married myself :) Thanks so much for stopping by and I hope you all have fantastic Friday nights!
Subscribe to:
Posts (Atom)