Pages

Showing posts with label nail art. Show all posts

Friday, September 26, 2014

Product Review: Born Pretty Store, Quirky Arabesque Stamping Plate


*Born Pretty Store products provided for honest and unbiased review.  All other products mentioned were purchased by me.*

Hello there, everyone!  You may remember me mentioning how much I love stamping at the moment, so when Born Pretty Store asked me to review some items, I knew right away I wanted to give some stamping items a try!

 Image from Born Pretty Store

Whilst perusing their site, which if you haven't been has tons of great nail art items at really reasonable prices,  I came across some fun plates.  I decide to try out plate QA88 with a pattern they called "Quirky Arabesque".  Fitting, no?  The swirly patterns and "infinity" style appealed to me right away.  (Infinity plates are ones with designs that cover the whole plate so you can stamp anywhere and get an "infinite" number of patterns.)  This is a smaller plate at just over 2 inches across so it's a little more limited than, say, the Pueen Encore plates or MoYou's...but it's still a pretty pattern with lots of great looks.


I began this manicure with 3 coats of Sinful Colors Easy Going, a barely there, pink creme.  Initially when I saw this plate, I thought it might be good for leadlighting so I wanted to start with a light base to try that out.  The stamping polish I used is part of a set from Born Pretty Store and I'll be reviewing that set in a few days.  Overall, QA88 is a good plate.  I had no issues getting it to stamp and I received it in perfect condition with no scratches or dents.  You can see a few spots on the tips of my nails where the pattern "skipped", but that is more likely due to my own stamping skills (or lack thereof; I'm getting better, but not perfect!) or the fact that a few of my nails curve under when they get to a certain length.  So that's nothing I can point to as a product issue. 


And, as I thought when I saw it, QA88 is great for leadlighting!  The pattern is open enough to allow you to fill in the design with whatever colors you choose.  I went with a multicolored design created with Zoya's Frida, Wet 'n' Wild's Trippin' on the Boardwalk, Simply Sweet in pink neon, and a random yellow.  Kind of has a circus vibe, but I love it!

If you're looking for an inexpensive infinity plate with a fun pattern, this one might just be for you! Plate QA88 retails for $2.09 and shipping is free with non-registered airmail or minimal with airmail tracking (depending on where you live).  I always find their shipping to be faster than I think it will be though their site does say it can take up to 20 days for delivery.  If you decide to purchase this or any other items from Born Pretty Store, feel free to use my referral code, YFL91, to save yourself 10%!

Thank you so much for reading and I hope you enjoyed the post!

Monday, August 4, 2014

Leadlighting: The First Attempt


Hi there, all!  As I mentioned recently, I'm all about the stamping lately.  I love the looks that you can create with it and once you get the hang of it, it's so easy!  I know if you're just starting out stamping that you won't believe me, but I swear it's true.  Continuing with my stamping obsession, I decided it was high time I tried leadlighting.  Leadlighting is a technique which gives a finished look reminiscent of stained glass, which is were the name comes from.


I started with 3 coats of OPI My Vampire Is Buff and then stamped on top with Sinful Colors Black on Black and Pueen's Encore plate SE04B.  I topped everything with a coat of Seche Vite before I started the leadlighting part.


Basically, the premise of leadlighting is pretty simple.  It's like a coloring book, using sheer jelly polishes to fill in the stamped outlines.  I used Sally Hansen's Triple Shine in Grape Jelly mixed with a bit of Wet 'n' Wild's Trippin' on the Boardwalk to up the opacity a bit.  The SH is a great polish for leadlighting but it's very, very sheer.  I wanted a touch more opacity for this look.  After filling in a few random flowers, I decided I wanted another punch of color so I used SH's Triple Shine in Play Koi mixed with a homemade jelly polish (which you can learn how to do here). I just dabbed it onto the center of the non-purple flowers with a dotting tool.


I'm happy with this for my first attempt at a new technique.  My main issue is that I loved the mani so much before I added the color that I'm a bit disappointed that I tried it at all.  But it does have a lot of possibilities, which I'm pretty excited about.

Have you tried leadlighting?  I'd love to see your manicures!  Thanks so much for reading and I hope you enjoyed this post :)

Sunday, June 1, 2014

Grunge Butterfly Manicure + Tutorial


Hi there!  It's been a busy weekend here at the OTTC household!  I helped my boss with an art festival on Friday and the bf and I hit the Chicago Botanic Garden yesterday.  We had a perfect day for it and I snapped lots of lovely flower photos!  Spring gives rise to most of my favorite blooms, including poppies and irises (my all-time favorite!).  What goes more naturally with flowers than butterflies?  Today I have a very dramatic manicure to show you and I've included a tutorial at the end so you can recreate it!


I had actually started out this mani with a different intent but when I started working on it, the patterns reminded me so much of Monarch butterfly wings that I just ran with it. 


For this look, I used Studio M polishes in Volt of Light, Psychedelic Scene, Hot Zone, and Lovin' It as well as Sinful Colors in Black on Black.  Yes, I know that sounds like a ton of polishes, but the look is actually pretty easy to achieve, I promise!


I wore this mani for several days because I was just so in love with it!  The bold black lines and bright colors are sure to catch everyone's eye...I got tons of compliments on this manicure so let's get to that tutorial so you all can try it out!

What you'll need: paper towels, acetone/nail polish remover, a small nail art brush (a small paint brush works well, too), base and top coat, at least 3 brightly colored opaque nail polishes plus a black nail polish

Step 1: Start with your preferred base coat.  We'll be using lots of polish here in different colors and you don't want any staining!

Step 2: Apply 1-2 coats of each of your chosen polishes.  I suggest you choose opaque polishes rather than sheers.  You'll need each color to be opaque to get good results and if you have to use 4 coats of a polish for opacity, you're either going to wait forever for things to dry or end up with a gloppy old mess.  For my tutorial photos, I used Sally Hansen's Insta-Dri in Lively Lilac, Blue-Away, and Snappy Sorbet.  Be sure to allow plenty of drying time between color layers.  You can speed things up with a thin coat of a fast dry top coat between the colors (I used Seche Vite for mine), but I've had better results if I let things dry on their own for about 10 minutes in between colors.


Step 3: Apply one coat of your black polish.  I've used Sinful Colors Black on Black for this tutorial.  Allow to dry (you can also apply a thin coat of a fast drying top coat, if you're in a hurry).

Step 4: Using your small nail art brush dipped in acetone (or nail polish remover, but I've found pure acetone gives better results), begin removing the top layer of black polish so the under layers of polish show through.  This can be a tricky step.  I usually clean my brush with a paper towel and re-dip it in acetone between each swipe on the nail.  After a few swipes with acetone, you'll see the layers of polish colors begin to show through.  You don't have to imitate a butterfly wing.  This technique can be as precise or abstract as you like.

Step 5: Continue removing the polish layers carefully until you are satisfied with the look.  Be aware that if you remove too many  layers you'll be left with bare nail, which is not what we're looking for here.

Step 6: When you're happy with the way your manicure looks, top with your favorite top coat to finish.  You can also use a smoothing top coat.  Because you've "scraped" out layers of polish, you may need a smoothing top coat (like Gothic Gala's Smooth Me Over Top Coat or Carpe Noctem Cosmetics' Glitter Slayer) to smooth out the bumpiness.

I originally saw this technique at nailsadorned.com, but when I went to find her site to give credit, it wasn't around anymore.  I'm assuming that she's given up her site (which is too bad cuz she did some great stuff!) but maybe she just moved somewhere else.  If anyone knows differently, please let me know as I'd like to link to her current page! She used the technique in a different way, but I wanted to give her credit for giving me the idea.

I'd love to see any looks you guys come up with using this technique so feel free to link photos or posts to this one if you use it :)  Thanks so much for reading!

Sunday, April 13, 2014

Autism Awareness Manicure

*Nothing to disclose*

Hi there!  Long time, no see, huh?  Sorry about that.  I haven't felt much like blogging lately...been a bit burnt out.  But I definitely wanted to share my Autism Awareness mani with you guys!  As many of you may know, April is Autism Awareness Month and quite a few bloggers show their support by doing blue manicures or manis with puzzle themes.  I decided to combine both for my design!


Everything show is done with polish and I'll include a list at the end of the post of the polishes I used.  I created the interlocked puzzle designs on my thumb and ring finger by taping off sections of each nail and painting them a different a shade of blue.  Then I used a large dotting tool to create the interlocking part of the pieces.  It's a fairly easy technique, but a little time consuming to get everything lined up just right.

I freehanded both the puzzle Autism ribbon and yellow puzzle piece with different colors of polishes and dotting tools, then did a simple sponged gradient on my middle nail.  I love the way this whole mani came together!

Thank you so much for reading!

Polish list:
Base color: Sally Hansen Xtreme Wear~Breezy Blue
Gradient and Interlocking Puzzle Pieces: Sally Hansen Xtreme Wear~Breezy Blue & Pacific Blue, Orly~Snowcone, Sinful Colors~Into The Blue
Autism Ribbon: Sally Hansen Xtreme Wear~Breezy Blue & Pacific Blue, Wet 'n' Wild Wild Shine~Red Red & Get Lucky
Pinky Nail Puzzle Piece: Wet 'n' Wild Wild Shine~Get Lucky
Black striping polish

Sunday, March 2, 2014

Barielle Mardi Gras Manicure Contest Entry


Hey everyone!  Hope your weekend has been lovely.  It's been pretty good for me...got to visit a friend's brand new baby who is as cute as a button :)  And with a WSU Shockers basketball win for a perfect season AND a Chicago Blackhawks win last night at Soldier Field, it was an awesome sports weekend as well!

Anyway, I wanted to take a minute to show you guys my Barielle Mardi Gras Manicure Contest entry.  I've entered a few of their contests and haven't won yet, so I'm crossing my fingers on this one!  The prize is a $100 gift certificate...think of the polish I could snag with that!


I basically tried to pack as many Mardi Gras-related ideas as I could in this manicure.  Mostly it relies on the colors of Mardi Gras; green, purple and gold/yellow.   I used all Barielle colors.  The green is Sweet Addiction, the yellow is Lemondrops, and the purple glitter on my pinky is called Purple Hearts.   I added accents with glitter, studs and striping tape.  The mask on my index finger is actually a large bat-shaped glitter that I turned upside down and then painted on :)

If you are at all interested in voting for me, not only would I really appreciate it, but you know some of that $100 gift certificate will end up as giveaway prizes ;)   The contest is open for voting through Monday, March 3 at midnight EST. All you have to do is follow this link, scroll til you see my name (Natalie Dirks) and then click on the voting box next to my entry.  It's pretty easy!  

Thank you so much!

Friday, February 21, 2014

Olympian Manicure


Hi there!  Thank goodness it's finally the weekend!  It's been a long week over here, and I'm thrilled to have two days in a row with nothing planned.  Like many of you I'm sure, I've been watching the Olympics most evenings over the last several days.  Last night, when I was looking around for a manicure inspiration, my eyes alighted on Adelina Sotnikova's skating outfit.  Then she won the gold medal and it pretty much sealed the deal.


As skating costumes go, this one is pretty tame.  But I love the color combo and you can never go wrong with a little bit of sparkle!


Here's what I came up with!  My mani comes off as more gold than her outfit, but that seems fitting when you consider the medal.  I started with 2 coats of China Glaze's Mingle with Kringle, a bright gold foil-like polish with some coppery glitter thrown in.  I topped that with a coat of Sinful Colors in All About You, a fine gold glitter topper again with copper glitter as well.  I wasn't able to quite capture that aged gold/bronze color of Adelina's glitter, but it's pretty nonetheless!


For my accent nail, I used striping tape to create a pattern similar to the skating costume's bodice.  I applied one coat of Sinful Colors in Smokin', a neutral dark grey creme.  I then removed the tape, et voila! the pattern was created!  I had originally wanted to do this on all my nails, instead of just an accent, but it was after midnight when I'd done the one and I just couldn't stay up any later.  I must be getting old...time never used to matter when it came to getting the perfect mani!
 

I hope you guys enjoyed this mani.  It was a lot of fun to wear and now I'm thinking I might do a few more skating costume-inspired manicures...the costumes are so pretty and almost all of them have glitter!  How could you go wrong?  :)

Please take a moment to enter my 1700k Facebook Likes giveaway that's currently open.  There are some great prizes available and I'd hate for you to miss out!

Thanks so much for reading!

Thursday, February 13, 2014

Indie Spotlight: Spellbound Nails The Druken Leprechaun Duo


Hi there, folks!  I hope everyone is having a great week!  It's been awhile since my last post (which included a giveaway, so be sure you don't miss it!) and I've got some fun stuff coming up for you to check out!  To start off, Ashely from Spellbound Nails has a new St. Paddy's Day duo coming out and was kind enough to let me play with them before they release.  The set is called The Drunken Leprechaun Duo and consists of two shades of green holographic polish.  As an added bonus, these polishes glow in the dark!


First up is Magically Delicious, a mossy green holographic polish.  There are times when I have a bit of trouble figuring out if a holographic is linear or scattered and that's how it is with these two.  I'm going to go with scattered for these, but it's a strong effect.  


Next up is Lucky Charm (she what she did there?).  A light sage green scattered holographic polish and my favorite of the two.  They're both pretty, but the way the light hits LC just makes it sing...with an Irish lilt! 


Ashley asked for some nail art with these two polishes, so that's what I've done in lieu of the standard swatch.  I alternated MD on my thumb, middle, and pinky nails with LC on index and ring nails.   I'm showing 3 coats of each here.  The formula was great on both of them and they dry with a bit of a semi-matte finish so you'll most likely want to top coat them.  I used a coat of Seche Vite here (post nail art) and noticed no dulling of the holographic effect.  In fact, in this case I think it enhances it. 


This was my first attempt at negative space nails.  You can see (or at least I hope you can!) two little negative space shamrocks on my middle and ring fingers.  The technique is pretty easy to do, but a little finicky to pull off.  I outlined the design using Moon Frost by Kleancolor.  One Nail to Rule Them All has a great tutorial if you're interested in trying it yourself!  My thumb, index, and pinky nails are stamped with little clovers using a generic store plate (it came in one of those little stamping kits) and Sinful Colors' Last Chance. 

I have to preface this last photo with an apology and a plea for help!  I'm rubbish at taking long exposure photos and can't figure out any other way to photograph glow in the dark polishes!  So I'm terribly sorry for the quality of this photo but I wanted to give you an idea of the glow.  If you've got any tips for low light photography, I'd love to hear them!


You can see, it's not the best photo ever, but these polishes do have a nice glow to them.  Also, Ashley has said that her new batch of glow in the dark additive has an even stronger glow than this, so if you order this duo you'll get more bang for your buck!  Both of these polishes are so pretty and just perfect for St. Paddy's Day or just Spring in general.

If you're interested in ordering The Drunken Leprechaun Duo, they'll be available for presale beginning this Saturday, Feb. 15th through Feb. 22nd on Etsy and Storenvy.   You'll have to purchase both polishes if you opt for the presale but you'll get the discounted price of $16.  If you decide to wait, the full release will be on 3/1.  Regular pricing is $18 for the set and $9 for an individual bottle.  And can I have a "hurrah!" for an indie maker offering a holiday polish a good while in advance of said holiday?  It's so frustrating to order a holiday polish and not have it in time to wear it before or even on that holiday!  

Make sure to follow Spellbound Nails on Facebook to keep up with new releases, giveaways, and other relevant info!  Thanks so much for reading!

Monday, December 16, 2013

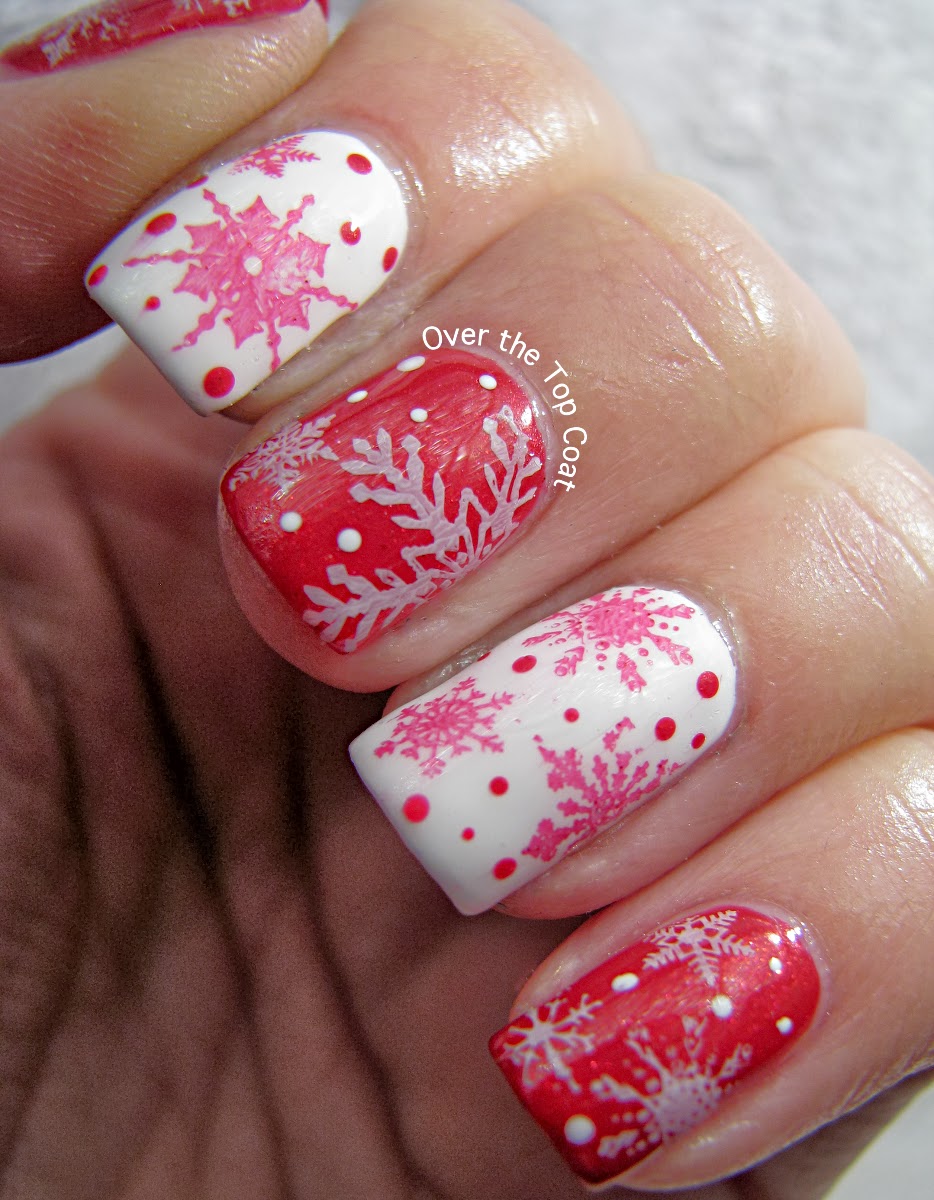
Red & White Snowflakes (or My Very First Successful Stamping...Woot!)


I was going to wait to post these til tomorrow but I'm just so excited I couldn't wait!  I've finally, finally conquered stamping!  Now, it's not 100% perfect, but it's so much better than any other stamping attempt I've ever managed.  I got a tip from somewhere online that I should rough up the stamper with a nail file and then clean it with acetone.  It appears to have worked!  Thanks to whoever gave me this info, though I can't for the life of me remember where I saw it.

Everyone always has such adorable stamped snowflake manis for the holidays and now I have one, too!  I give you my first successful stamping manicure!


I used Glitzy Glazes' Hickory Honey Ham and Essie's Blanc for this mani.  I. Love. It.  So much!  Both of these polishes worked really well for stamping.  HHH shows a little pink on the white, but I like it.  It reminds me of redwork embroidery.  I used a small dotting tool to add in some smaller "snowflakes" in the empty bits.


I hope you guys enjoyed the photos, I'd love to hear what you think of it :)  Thanks so much for reading!

Wednesday, October 23, 2013

Halloween Slashers, Monsters, Serial Killers, Etc. Manicure


Hello everyone!  As we edge closer and closer to Halloween, I'm seeing some fantastic nail art and manicures out there!  I decided to try my hand at another Halloween nail art contest, this one sponsored by FancyDawn, You Polish, and Lace and Lacquers.  The contest is accepting entries until Friday, Oct. 25th and there are 3 categories; Halloween manicure, Halloween makeup, and Overall Most "Liked".  So, I've got two chances to win, the first in the Manicure category based on judging and the second chance in the Overall category by asking everyone I know to go to FancyDawn's facebook page and "like" my entry...ahem, ahem...hint, hint.  :)  I do hope you guys will vote for me if you like my work!  If you'd like to vote by "liking" this photo here, you'll be my very bestest friend, ever!.  And, after all that, here's what I did!


I hope these guys are all pretty recognizable to you!  I went with a Halloween bad guy theme, covering some of my favorite villains from horror movies.


I'll do a quick lineup for you, in case you can't tell who some of these guys are (I'm also linking to the source photos, so you can see how far off I am lol).  On my thumb and affectionately termed "Pinhead" is the chief Cenobite from the Hellraiser franchise. Pinhead has always had a "good guy" persona lurking underneath his evil facade for me, owing to his letting the girl go in the first movie...that said, I still wouldn't go messing with suspicious puzzle boxes, just in case!

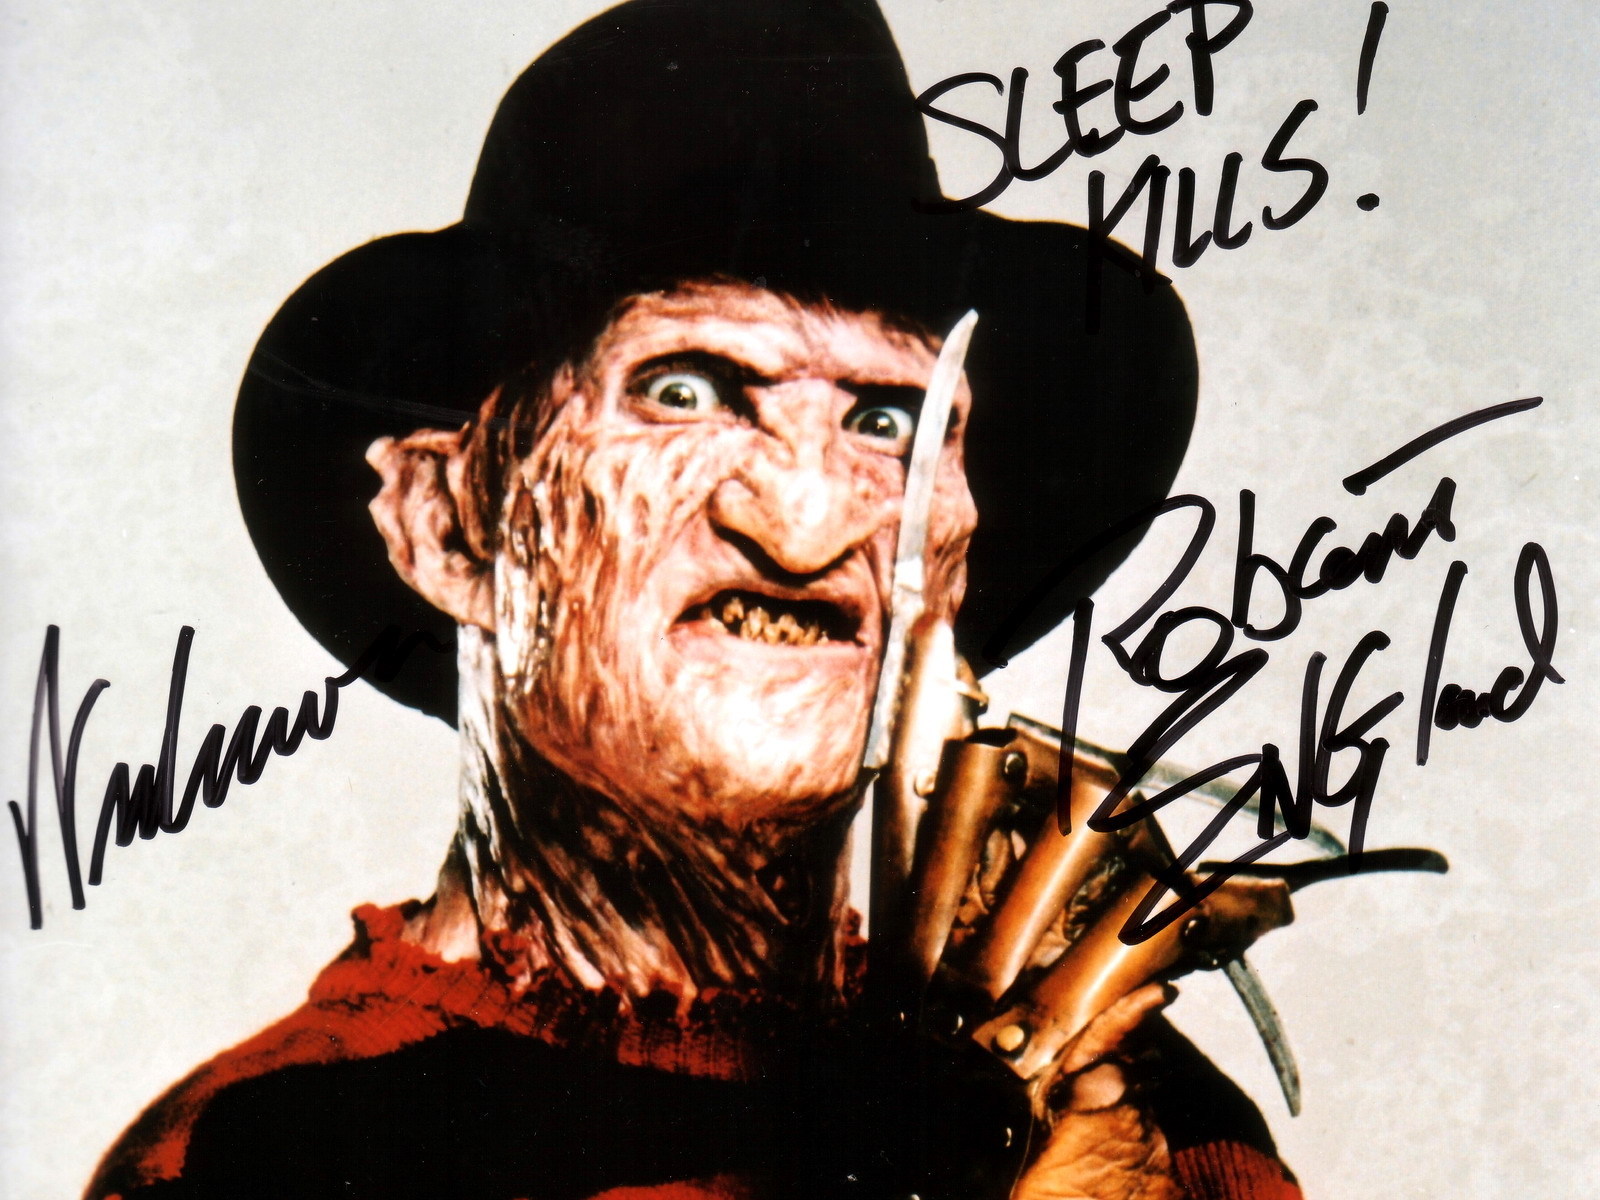
My index finger has become the host for my all-time favorite dream-invading psychopath, Freddy Krueger!  Nightmare on Elm Street made everyone who saw it afraid to sleep and validated my suspicion that little blond pigtailed girls in white dresses are a bad omen.  Freddy has always been a favorite of mine because I love camp and Krueger's dry humor sticks it straight to my funny bone. As you might suspect, given his ornery nature, Freddy gave me the most trouble.  I believe I spent a total of 2 hours on that nail alone, what with starting over 3 times!  He's still not perfect here, but I did manage to get his sneer and his knives down and, overall, I'm proud of him.


Michael Myers, of Halloween fame, has taken up residence on my middle fingernail.  While he has the least amount of personality as a character in this group (imho), this is my favorite design of the 5. That stark black and white contrast is hard to beat.  I mean, I know he's scary what with the whole "never dying" thing, but his soul is just as blank as that Will Shatner mask and throughout TEN movies, the man never says a word.

My next favorite design is Mr. Vorhees from Friday the 13th, who has set up shop on my ring finger.  The archetypical "Momma's Boy",  Jason's iconic hockey mask was originally worn by his Mommy Dearest as she hacked her way through the campers she believed responsible for her sweet baby boy's drowning.  The first Friday the 13th can boast one of the first "twist" endings in horror cinema history, though Jason wins second place in the non-verbosity category.


This brings us to my pinky, a.k.a. "Ghostface" from the Scream movies.  The only killer on this list that is actually an inanimate object, the mask from Scream was worn by many different crazed murderers and won Wes Craven acclaim for "reinventing" the genre; although killing off your top-billed star (Drew Barrymore) in the first scene is definitely a nod to the all-time horror master, Alfred Hitchcock (Psycho, with Janet Leigh).  Scream proved that will all the high-tech nonsense horror creates these days (Shark Night 3D, anyone?), a simple masked maniac with a knife and no apparent motive is still pretty friggin' scary!

Alright, after all that, I hope you all enjoy the manicure!  Everything was painted with polish directly on the nail.  I'd include a list, but I used so many colors I'm not even sure anymore which ones lol  If you do have a moment and feel like it, I'd love it if you went and voted for my entry, by "liking" this photo on FancyDawn's Facebook page.  I appreciate you taking the time to read, though, even if you don't vote!

Thanks so much!


Monday, September 2, 2013

Autumn Leaves Manicure


Holy cow, I'm posting all over the place this weekend!  Don't get too used to it, I'd hate to have to live up to that expectation lol Here in the U.S., Labor Day signifies the end of summer.  The swimming pools close and we begin the slow (hopefully) slide into cooler temps.  Most people bemoan the end of summer, but I love autumn so much, I can't be too sad.  Football, sweaters and crispy, falling leaves are just a few of my favorites bits about the upcoming season.  In commemoration of those crunchy leaves, I've done a cute Fall mani.


I actually started this manicure to submit it to Neffy's Nail Corner's Back to School/Autumn nail art contest and I did use part of it to enter.  But I liked my leaf-themed nails so much, I reworked it into an exclusively autumn mani. 


The base polish here is my very first franken/homemade polish.  I used an old bronze-y black/gold eyeshadow and some solvent resistant glitter from Julep mixed into a bottle of clear Wet 'n' Wild polish.  It actually turned out to be a lovely, rich espresso brown with bright orange flecks in it.  The only downside is that, since the W'n'W isn't a suspension base, everything settles really quickly.  But it looks rather nice on the nail and I'm kinda proud o' it :)
 

I freehanded the leaves in with Sinful Colors' Pull Over, Clementine, and Energetic Red.  The leaf details are done in KleanColor's Texan Cowboy from their Nail to Toe line.  Then I did a simple glitter gradient on my index and pinky nails. The glitter is the aforementioned Julep.

This is one of my favorite manicures ever, I have to say.  It's been awhile since I've done any freehand nail art and the little leaves turned out so cute!

Are you guys ready for Fall?  Or are you holding on to summer with a death grip?   lol

Before I sign off, don't forget about The Nail Files Turned 2! Giveaway that I'm a part of.  Get those entries in, ladies!  There are a ton of great prizes!

Thanks so much for reading :)

Friday, August 23, 2013

Born Pretty Store Review: Nail Art Foils

*Product provided by Born Pretty Store for honest review*

Happy Friday, everyone!  I've got a whole lot of nuthin' planned for the weekend (with the exception of brunch with my girls on Sunday), which is just the way I like it!  I might manage to get some nail-related things in there, too ;)

Today I have another Born Pretty Store review for you guys, this time with nail art foils.   I hope you aren't tired of these reviews yet, cuz these foils are outstanding!  Take a look:


I chose to review #21 from this set which has a pretty, bright blue to grass green gradient and a fractal pattern.   The foil came in one long strip; 113 cm (44 inches) by 2.5 cm (just under 1 inch).  The strip was packaged in a cute little plastic container with a lid.  Following the directions on the website, I applied 2 coats of Deborah Lippmann's black Edge of Glory polish as my base.  These foils were SO easy to apply.  I cut the long strip into smaller pieces about 1.5-2 inches in length and then  I used my Ciate nail foil glue rather than leaving my last coat of base polish tacky as suggested, which worked really well.  On most of my nails, I was able to get almost ALL of the foil off.  This created a cool kind of marbled effect with the base polish peeking through.  I topped it all with a coat of Seche Vite to seal in the look.


You can see a bit of the fractal pattern in the macro shot above.  I'm really pleased with these foils.  It's only my second time using foils of any kind and, so far, I have to say that Born Pretty Store's are much better than the Ciate kit (you can read that post here) I purchased at Marshall's a couple of weeks ago.  You do need to be careful when handling the foil, especially if you have wet nail polish on your nails.  These will stick very quickly and don't offer a lot of wiggle room to redo a nail.  You can reapply foil glue or polish and restick the foil on top of a mistake, but I think they look nicer when you do it all in one go.


*Product provided by Born Pretty Store for honest review*

These foils are $2.99 for the aforementioned 113 cm. strip.  Shipping will cost a couple of bucks if you want registered mail.  Otherwise, it's free if you want to take the risk of no tracking! And, if you use my code below, you can save 10% off of your total purchase.  Pretty sweet deal, huh?


And a quick reminder about my 100+ Trifecta Giveaway.  If you haven't entered yet (what are you waiting for??), you have 8 days left!  Don't miss out on your chance to win 1 of 6 great prizes!  

Thanks so much for reading :)

Monday, August 5, 2013

Sh-sh-sh-SHARK Week Manicure


Howdy everyone!  Hope your week has started out well.  My morning began with a humungous break on my middle finger nail on my photo hand, of course :(  For now, I'm not cutting back my other nails cuz I just can't, I can't!  I'm a reformed nail biter so any time I'm forced to cut back or shorten my nails, it's quite tramatic.  So, for now, ya'll will just have to live with my middle nubbin lol

Did anyone catch the Megalodon special that kicked off Shark Week on the Discovery Channel last night?  Complete nonsense, but it was interesting to watch.  One of my favorite movies is Jaws and I've been known to watch Shark Week obsessively in the past but what I haven't done yet is a shark-themed mani so it seemed like the right time.  Especially since I was able to work my shorty nail into it remarkably well...well, at least I think so.  Whaddya think?


I'm totally loving this!  It's been so long since I did nail art and I really had a lot of fun with this one.  If you've been watching the promotion of Shark Week 2013, I'm sure you've seen the Snuffy the Seal commercial.  OMG, I laughed so hard the first time I saw it!  My thumb nail is sporting an "I Heart Snuffy" logo, with a shark-bite chunk taken out of the heart.


 You've got the standard Jaws reference on my index finger.  I wanted to include the little swimmer above the shark that's in the movie poster, but I just ran out of time.


My ring finger represents blood on the water...is it merely chum?  Or something more sinister?  I'll leave it up to you to decide :)  I based this nail off of a tutorial by Chalkboard Nails...although hers didn't have any blood on it lol 


I did a little hammerhead shark silhouette on my pinky as well.  The shark's outline is done in Sharpie.
 

Thanks so much for reading!

Friday, August 2, 2013

Born Pretty Store Review: 3D Nail Art Stickers

****Product supplied for honest review by Born Pretty Store****

 
Hello and welcome to the weekend!  Well, almost.  I've managed the day off so I get to start early...woot!  I've got a fun little review for you guys today from Born Pretty Store.  If you're unfamiliar with BPS, they're an online store that sells tons of great beauty products including nail polish and nail art supplies.  Their prices can't be beat and although shipping does take awhile to the States, it's usually worth the wait.

Today I'm reviewing some 3D nail art stickers.  This sheet of gold colored nail art stickers includes a few different designs, including stars, hearts, and some pretty scroll patterns.  I was pleased upon opening the package to see the variety of designs and had a few ideas straight away on how to use them.   For this manicure, I went with a kind of art deco feel by using the little scalloped shapes as a half moon design and adding a larger sticker on my accent nail.  I started with 2 coats of Cobalt by Nina Ultra Pro (which I should do a separate post on, cuz it's frickin' gorgeous!) as a base color.


The stickers were easy to peel off the plastic backing using tweezers and they were easy to place on the nail.  The instructions on the packaging recommend applying base color, letting it dry, placing the stickers and then adding at least 2 coats of top coat to seal the design in.  I did follow those instructions for this manicure, but I'd suggest a little change for future use.


With the suggested method, I found the edges of the stickers kept wanting to curl up, even with 2 coats of Seche Vite.  After some experimenting, I found if you apply the stickers when your base color is still a bit tacky, the sticker edges adhere better and the end result looks nicer.  You could also let the base color dry and then apply one coat of top coat and then adding the sticker while that coat is still tacky.  After 2 coats of top coat with either of those methods, I was much happier with the outcome.  Placement is a little trickier with these methods, you won't be able to move the stickers without smudging your base coat, but that still beats the edges of the stickers getting caught on clothing all day long!

****Product supplied for honest review by Born Pretty Store****


Overall, I liked these stickers.  I love the variety of designs and how they look on the nail.  They retail for about $5 and, though I probably wouldn't purchase them by themselves, if I had an order going I'd definitely throw them in my cart!

If you're interested in purchasing these or any other products from Born Pretty Store, feel free to use my code YFL91 to save 10%!  


Thanks for reading!

Wednesday, June 5, 2013

ABC Challenge: V is for Viking


Howdy, everyone!  It's Wednesday again and so time for another ABC Challenge post!  I'm a little sad that we're already on to 'V' because that means we only have a few letters left before it's all over.  I'm going to miss posting these every week.  I have heard rumors that the group may do another new challenge once this one is over, I hope those rumors prove to be true!

In any case, we're here to talk about this week's letter, not to speculate on future manicure wonderfulness.  I'm so excited to show you what I came up with this week!  I wracked my brains to come up with a fun idea.  I even asked my boyfriend for suggestions.  He came up with a few, but nothing was clicking.   All of a sudden, Vikings jumped in my head!  The funny thing is that he's kind of cuckoo for Vikings, so I'm surprised he didn't come up with it.  But no matter who the credit goes to, this is one tricked out Viking mani!


Whaddya think?  I'm pretty proud, if you can't tell ;)  I used a bunch of different polishes here, so I'll put a list at the end of the post.  The Viking head and the ship prow (on my index finger) are handmade decals.  I've used this technique before and it's SO much easier than trying to paint detailed images on my right hand.  Basically, you coat part of a ziploc baggie with clear polish, let it dry, and then paint your image in polish on top.  When the polish dried, it will peel off the baggie, et voila!  Handmade decal!  Incidentally, the Viking has been christened Ivar Bluetooth by my boyfriend.  I guess Ivar was a real Viking king and predates the modern Bluetooth by a few hundred years.

I can't wait to see what everyone else came up with for 'V'.  If you've got a few minutes, please check out the other participants' pages.  You can find them via the thumbnails below!  Thanks so much for reading!

Polishes Used:
LynB Designs~Oobleck
China Glaze~Mahogany Magic
Sinful Colors~Sail La Vie, Unicorn, Pull Over
Essie~Yogaga
NYC~Sidewalkers
Black, white and gunmetal striping polish
Sharpie


Tuesday, May 28, 2013

ABC Challenge: U is for Unicorns


Hey there!  We've got another tough letter this week for the ABC Challenge with 'U'.  I didn't sweat it too much cuz 'U' really only stands for one thing and that's Unicorns!


Aren't they cute??  I couldn't get a great photo of them because I kept getting a glare no matter which way I moved my hand, but I hope you get a general idea of the adorableness here.  I used this tutorial as inspiration for this manicure, and while my unis aren't perfect, I still think they're pretty darn cute and more than sufficient to meet the letter requirement this week :)


I'm a little sad that I only had time to do one hand completely, so my right hand is unicorn-less, but at least I have five of the little buddies on my left to cheer me up :)  Additionally, I have a crap ton of nail mail coming this week and I may have spent half of my rent budget on sales this weekend.  My local Sally's had China Glaze's Cirque de Soleil collection (including Creative Fantasty and It's a Trap-eze) and the Avant Garden collection (including Fancy Pants and Keep Calm, Paint On) on clearance so you know I had to pick up about 6 of those.  Plus, my Ulta restocked O.P.I.'s My Vampire is Buff AND I Can't Find My Czechbook which I've been missing out on.  All in all, a good polish weekend was had!

I can't wait to see what the creative ladies in the Challenge came up with for this week.  You can check them out via the thumbnails below.  As always, thanks so much for reading!

Polishes used:
China Glaze~Tart-y For the Party & Keep Calm, Paint On
O.P.I.~I Can't Find My Czechbook
Sinful Colors~Unicorn, Into the Blue, & Snow Me White
Barielle~Ballroom Dancer
Nicole By O.P.I.~Top of My World
Wet 'n' Wild~Kaleidoscope 
Milani~510 3D