I was going to wait to post these til tomorrow but I'm just so excited I couldn't wait! I've finally, finally conquered stamping! Now, it's not 100% perfect, but it's so much better than any other stamping attempt I've ever managed. I got a tip from somewhere online that I should rough up the stamper with a nail file and then clean it with acetone. It appears to have worked! Thanks to whoever gave me this info, though I can't for the life of me remember where I saw it.
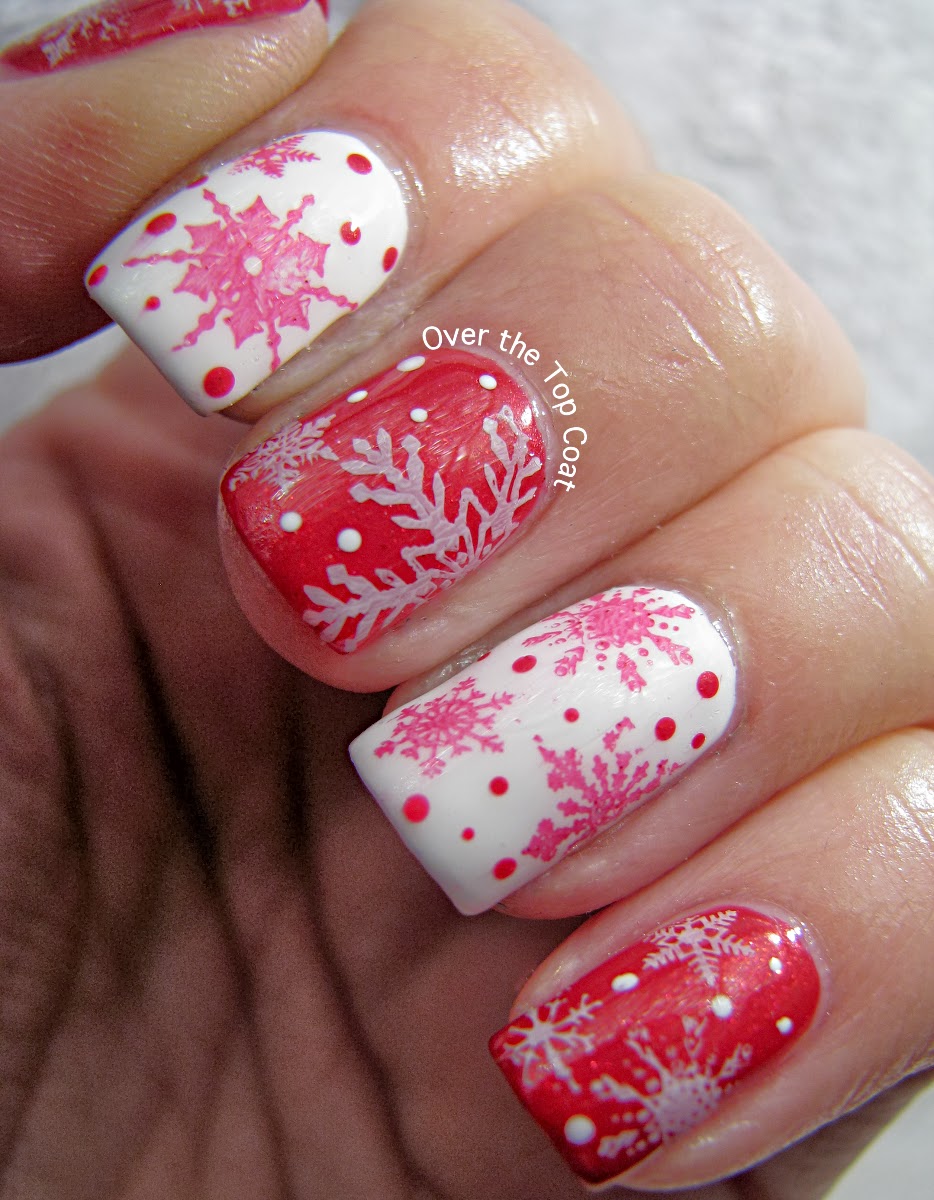
Everyone always has such adorable stamped snowflake manis for the holidays and now I have one, too! I give you my first successful stamping manicure!
I used Glitzy Glazes' Hickory Honey Ham and Essie's Blanc for this mani. I. Love. It. So much! Both of these polishes worked really well for stamping. HHH shows a little pink on the white, but I like it. It reminds me of redwork embroidery. I used a small dotting tool to add in some smaller "snowflakes" in the empty bits.
I hope you guys enjoyed the photos, I'd love to hear what you think of it :) Thanks so much for reading!
Howdy, everyone! I'm on a roll this week, three days in a row of posts...woot, woot! I love today's manicure so much, I'm just gonna jump right in:
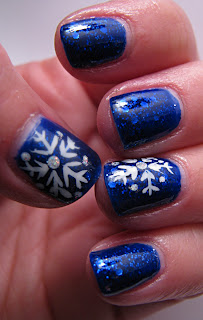
Isn't this fun? This is a perfect holiday manicure without being too in-your-face-Christmas lol I stared with a jelly sandwich. One coat of Revlon's Royal, one coat of Julep's Jordan, and another coat of Royal make up this pretty sandwich. Jordan is a gun-metal silver hex and micro glitter in a clear base and Royal is the most perfect royal blue jelly there ever was. Seriously, I broke my ban on Revlon polishes to buy this one cuz it's just too good to pass up! After the sandwich dried, I added some hand painted snowflakes for accents. I used a white striping polish and topped my dots with a holographic glitter striping polish. I got the idea for the design from Laatikollinen Lakkaa (again). If you've got a minute, you should really check out her Advent Calendar posts. She's got some great holiday manicure ideas! I changed things up a bit from her original design by using a dotting tool to add some extra dots around the edges. Here's another look:

I hope to keep up with my holiday manicures, since I'm having so much fun with them. Thanks so much for reading and please check back to see what's next!
Hello, hello! Two days in a row with a post, shocking, I know! I hope everyone's holiday season is turning out well so far. I've got my first holiday function this Sunday night with the crew from my job. I'm trying to get myself into the spirit of things this year, so I've got another holiday manicure for you today. This manicure is not my own design, as I found it on Pinterest and for once, the link back actually worked. You can see the original design here on Laatikollinen lakkaa. Aaaand here's my version:

So adorable, right?! I started here with 2 coats of Ulta's Salon Formula Nail Laquer in Diva, a pretty holographic glitter in a light pink shimmer base. I used Wet 'n' Wild's French White Creme for the "snowbanks" and dots of falling snow. The snowbanks were done using a method similar to Nailside's Freehand Cloud tutorial. For my accent nail, I used painter's tape to create a long triangle shape and then filled it in with e.l.f. in Green Machine, a dark green creme. I quickly went over GM with Wet 'n' Wild's FastDry in Happy Holidaze!, a teal multi-glitter jelly from their Party Rocks 2012 Holiday Collection, to add some sparkle and depth to the tree. My tree topper is a silver star from Wet 'n' Wild's Stars and Stripes. The ornaments on the tree are done with a dotting tool and e.l.f. in Cherry Bomb.
Overall, I thought this turned out great. I love the sparkle that Diva adds to the whole mani and the nail art came out great! Here's a close up of my accent nail:
I hope you enjoyed this manicure as much as I did. Check back for more holiday nails before Christmas! Thanks so much for reading!