Pages

Showing posts with label green. Show all posts

Wednesday, February 26, 2014

Green Jelly Sandwich Manicure

*All products mentioned purchased by me. Unsolicited review*

Good evening folks!  I've got a quick manicure to show you today so let's just get down to it!


I was in the mood for something bright and sparkly.  The dull winter weather lately has gotten me down and I'm just ready for spring!  To brighten up my nails, I started with 2 coats of Essie's Shake Your $$ Maker, a grass green jelly. 
 

After SY$$M dried, I applied 1 1/2ish coats of Lost Without My Blogger from LynBDesigns.   I love this polish!  Bright green and sage green dots, large white and metallic hexes, and various other hexes in greens, white and metallic all jumbled together in a bright green base...it's so spring-y!  It also has an easy application and great coverage.


After LWMB dried, I applied one more coat of SY$$M to complete the sandwich.  I'm totally digging how this turned out!  Squishy jelliness and glitter is a sure fire combo!   I'm not sure if SY$$M is still available in current Essie displays, but a quick search online should land you several options to purchase it if you're interested.  LWMB is currently available on Etsy for $8 for a full size bottle.  Be sure to stop by LynBDesigns' Facebook page to keep up with new products, sales, and other important info!  Check out her adorable new logo while you're there!

Thank you all for reading!

Thursday, February 13, 2014

Indie Spotlight: Spellbound Nails The Druken Leprechaun Duo


Hi there, folks!  I hope everyone is having a great week!  It's been awhile since my last post (which included a giveaway, so be sure you don't miss it!) and I've got some fun stuff coming up for you to check out!  To start off, Ashely from Spellbound Nails has a new St. Paddy's Day duo coming out and was kind enough to let me play with them before they release.  The set is called The Drunken Leprechaun Duo and consists of two shades of green holographic polish.  As an added bonus, these polishes glow in the dark!


First up is Magically Delicious, a mossy green holographic polish.  There are times when I have a bit of trouble figuring out if a holographic is linear or scattered and that's how it is with these two.  I'm going to go with scattered for these, but it's a strong effect.  


Next up is Lucky Charm (she what she did there?).  A light sage green scattered holographic polish and my favorite of the two.  They're both pretty, but the way the light hits LC just makes it sing...with an Irish lilt! 


Ashley asked for some nail art with these two polishes, so that's what I've done in lieu of the standard swatch.  I alternated MD on my thumb, middle, and pinky nails with LC on index and ring nails.   I'm showing 3 coats of each here.  The formula was great on both of them and they dry with a bit of a semi-matte finish so you'll most likely want to top coat them.  I used a coat of Seche Vite here (post nail art) and noticed no dulling of the holographic effect.  In fact, in this case I think it enhances it. 


This was my first attempt at negative space nails.  You can see (or at least I hope you can!) two little negative space shamrocks on my middle and ring fingers.  The technique is pretty easy to do, but a little finicky to pull off.  I outlined the design using Moon Frost by Kleancolor.  One Nail to Rule Them All has a great tutorial if you're interested in trying it yourself!  My thumb, index, and pinky nails are stamped with little clovers using a generic store plate (it came in one of those little stamping kits) and Sinful Colors' Last Chance. 

I have to preface this last photo with an apology and a plea for help!  I'm rubbish at taking long exposure photos and can't figure out any other way to photograph glow in the dark polishes!  So I'm terribly sorry for the quality of this photo but I wanted to give you an idea of the glow.  If you've got any tips for low light photography, I'd love to hear them!


You can see, it's not the best photo ever, but these polishes do have a nice glow to them.  Also, Ashley has said that her new batch of glow in the dark additive has an even stronger glow than this, so if you order this duo you'll get more bang for your buck!  Both of these polishes are so pretty and just perfect for St. Paddy's Day or just Spring in general.

If you're interested in ordering The Drunken Leprechaun Duo, they'll be available for presale beginning this Saturday, Feb. 15th through Feb. 22nd on Etsy and Storenvy.   You'll have to purchase both polishes if you opt for the presale but you'll get the discounted price of $16.  If you decide to wait, the full release will be on 3/1.  Regular pricing is $18 for the set and $9 for an individual bottle.  And can I have a "hurrah!" for an indie maker offering a holiday polish a good while in advance of said holiday?  It's so frustrating to order a holiday polish and not have it in time to wear it before or even on that holiday!  

Make sure to follow Spellbound Nails on Facebook to keep up with new releases, giveaways, and other relevant info!  Thanks so much for reading!

Wednesday, October 23, 2013

Mish Mash Challenge: Rainbow Nails


It's Hump Day!  That means it's Wednesday!  That means it's Mish Mash Challenge day!  I skipped last week's challenge because I spent so much time on my Sanderson Sisters manicure, then I almost skipped this week because of another Halloween manicure I've been working on (which will also hopefully be posted tonight!), but I didn't want to skip two weeks in a row...especially on the Rainbow Challenge!  I know there are going to be some stunning designs this week and I can't wait to see them!  After all the nail art I've done lately, I just stuck with some simple skittles for this week's Challenge.


I did dress these up a bit by using linear holographic polishes so you get rainbows with your rainbows!  Like I said, they're pretty simple but I like 'em!  I'll list the polishes at the end of the post so you can check 'em out if you'd like to.  Though I think a lot of folks were unimpressed with the China Glaze Holographics collection, the ones I've purchased (on half off of clearance at Sally's...woot!) are really pretty in my opinion.  They aren't in-your-face crazy holos, but the linear IS there and it's quite nice.


I apologize for the lack of sunlight in these photos but that's been in short supply lately here in Chicago.  If Apollo manages to drag his chariot into the sky tomorrow, I'll snap a quick one to show you the linear rainbows.

Polish List:
LynBDesigns~Am I Ginger?
DifferentDimensions~Tubular 
China Glaze Holographic~Not In This Galaxy, OMG A UFO, Strap On Your Moonboots 

Please take a minute to peruse the other Mish Mashers' work this week...I'm betting it'll be pretty!  You can find them via the thumbnails below.  Thanks so much for reading!


Friday, August 23, 2013

Born Pretty Store Review: Nail Art Foils

*Product provided by Born Pretty Store for honest review*

Happy Friday, everyone!  I've got a whole lot of nuthin' planned for the weekend (with the exception of brunch with my girls on Sunday), which is just the way I like it!  I might manage to get some nail-related things in there, too ;)

Today I have another Born Pretty Store review for you guys, this time with nail art foils.   I hope you aren't tired of these reviews yet, cuz these foils are outstanding!  Take a look:


I chose to review #21 from this set which has a pretty, bright blue to grass green gradient and a fractal pattern.   The foil came in one long strip; 113 cm (44 inches) by 2.5 cm (just under 1 inch).  The strip was packaged in a cute little plastic container with a lid.  Following the directions on the website, I applied 2 coats of Deborah Lippmann's black Edge of Glory polish as my base.  These foils were SO easy to apply.  I cut the long strip into smaller pieces about 1.5-2 inches in length and then  I used my Ciate nail foil glue rather than leaving my last coat of base polish tacky as suggested, which worked really well.  On most of my nails, I was able to get almost ALL of the foil off.  This created a cool kind of marbled effect with the base polish peeking through.  I topped it all with a coat of Seche Vite to seal in the look.


You can see a bit of the fractal pattern in the macro shot above.  I'm really pleased with these foils.  It's only my second time using foils of any kind and, so far, I have to say that Born Pretty Store's are much better than the Ciate kit (you can read that post here) I purchased at Marshall's a couple of weeks ago.  You do need to be careful when handling the foil, especially if you have wet nail polish on your nails.  These will stick very quickly and don't offer a lot of wiggle room to redo a nail.  You can reapply foil glue or polish and restick the foil on top of a mistake, but I think they look nicer when you do it all in one go.


*Product provided by Born Pretty Store for honest review*

These foils are $2.99 for the aforementioned 113 cm. strip.  Shipping will cost a couple of bucks if you want registered mail.  Otherwise, it's free if you want to take the risk of no tracking! And, if you use my code below, you can save 10% off of your total purchase.  Pretty sweet deal, huh?


And a quick reminder about my 100+ Trifecta Giveaway.  If you haven't entered yet (what are you waiting for??), you have 8 days left!  Don't miss out on your chance to win 1 of 6 great prizes!  

Thanks so much for reading :)

Thursday, June 13, 2013

Different Dimension's Money


Hiya, folks!  How's your day?  It's been pretty good for me.  It's amazing how a really good, hard work day can make you feel accomplished...especially when it means you get a 3-day weekend!  Yep, today turned out to be my Friday, yay!

Anyway, I have a fun polish to show you!  Different Dimension had a sale a couple of weeks ago to celebrate her impending (and, I'm positive, much deserved) vacation.  I couldn't resist grabbing a few polishes, so here's a swatch of one of the ones I picked up!


Meet Money.  Money is part of DD's Echoes collection, inspired by Pink Floyd songs.  I pretty much love everything in the collection and once I saw Money's dots, I knew she would be mine!  A white crelly chock full of holographic squares, gold and neon green hexes, small teal dots, and large teal, black AND holographic dots, this beauty made my heart go pitter-pat at first glance.


Look at all that dotty goodness!  I love the color combination and the formula was flawless.  Missi Barry, DD's maker, warns that the large dots might give some difficulty but I had no issues at all.  I turned the bottle upside down between coats and those larger dots just jumped right to the brush and from there to my nails.  I used 3-4 coats here, but you could definitely wear it over a white base for a faster payoff.  I love the depth in these types of polishes, so I'm usually happy to work up the opacity.
 

If you get a chance, you should definitely give Different Dimension polishes a try.  I've loved everything I've tried so far!

Thanks so much for reading!

Monday, May 27, 2013

Summer Gradient with Nail Pattern Boldness


Howdy, everyone!  I hope you've all had a nice holiday here in the States.  I have a quick, fun manicure for you today.  I actually got this idea from The Polished Perfectionist so I can't say it's original, but I liked the look so much, I knew I had to give it a try! 


I'm loving how this turned out!  I used Sinful Colors in Innocent and Why Not for the gradient and then topped it with Flipping Out Hard by Nail Pattern Boldness.


FOH is a glitter bomb packed with tiny blue, green, and yellow neon matte glitters.  I bought it because I think it looks quite a bit like Floam, which is a total lemming of mine.  When I got the bottle from NPB, I was stumped at how to use it.  I did try to build it up on its own, but didn't have as much success with it as I'd hoped so when I saw The Polished Perfectionist's post, I knew FOH was just perfect for this look!


What do you guys think? 

Thanks so much for reading!

Wednesday, May 8, 2013

ABC Challenge: R is for Rubik's Cube


Howdy, everyone!  I'm a late poster tonight.  I like to get my ABC Challenge posts up on Tuesday evenings but I was exhausted last night and had to wait to paint 'n' post until today.  Our letter this week is "R" and I thought it was going to be a super easy letter cuz everything starts with "R", right?  Yeah, not as many things as I thought and a lot of them were far too esoteric or general for nail art.  I surely could have grabbed a Revlon or a red and just done a swatch, but I wanted to do something more decorative this week.  So, after searching words that start with "R" via Google, I finally came up with Rubik's Cube!  I have a brother who can solve one of these in about 5 minutes; he says there's a trick to it, but I've never figured it out lol


Whaddya think?  I think they turned out really well and a good thing, too, since they took about 3 hours!  There was a lot of taping and striping polish used and, of course, after I started I realized there may have been an easier way to do it, but oh well.  It turned out in the end and that's all that matters ;)


For some reason, my camera didn't like the green I used (China Glaze's Four Leaf Clover) and it's showing up in these pics as more of a mint.  FLC is much more of a grass green, but you get the idea, I hope?


Thanks so much for reading and please take a moment to browse the other ladies' Challenge posts.  You can find them via the thumbnails below!

Polishes Used:
Sinful Colors~Snow Me White
Deborah Lippmann~Edge of Glory
Wet 'n' Wild Wild Shine~Red Red
Sally Hansen Insta-Dri~Orange Impulse
Sinful Colors~Pull Over
China Glaze~Four Leaf Clover
Sinful Colors~Endless Blue

Monday, April 29, 2013

Sinful Colors Diamond Lust Collection


Howdy, everyone!  How was everyone's Monday?  Mine was decent, got some very exciting nail mail to show you all later in the week.  Today's post, however, came about because I was strolling through my not-so-local Walgreen's the other evening and came upon this display:


I couldn't resist, I bought 6!  Shown above from left to right are: Queen of Deco, Crystal Clear, Gemtastic, Scene Stealer, Shine on Me, I Dream in Jewels, Rags to Riches, and Watch It Shine.  The whole collection consists of colorful glitters in clear bases, though the glitters do vary from polish to polish.

I have one whole manicure to show you, featuring my favorite from the collection and then a single nail swatch of the other shades I purchased.  Let's get started, shall we?


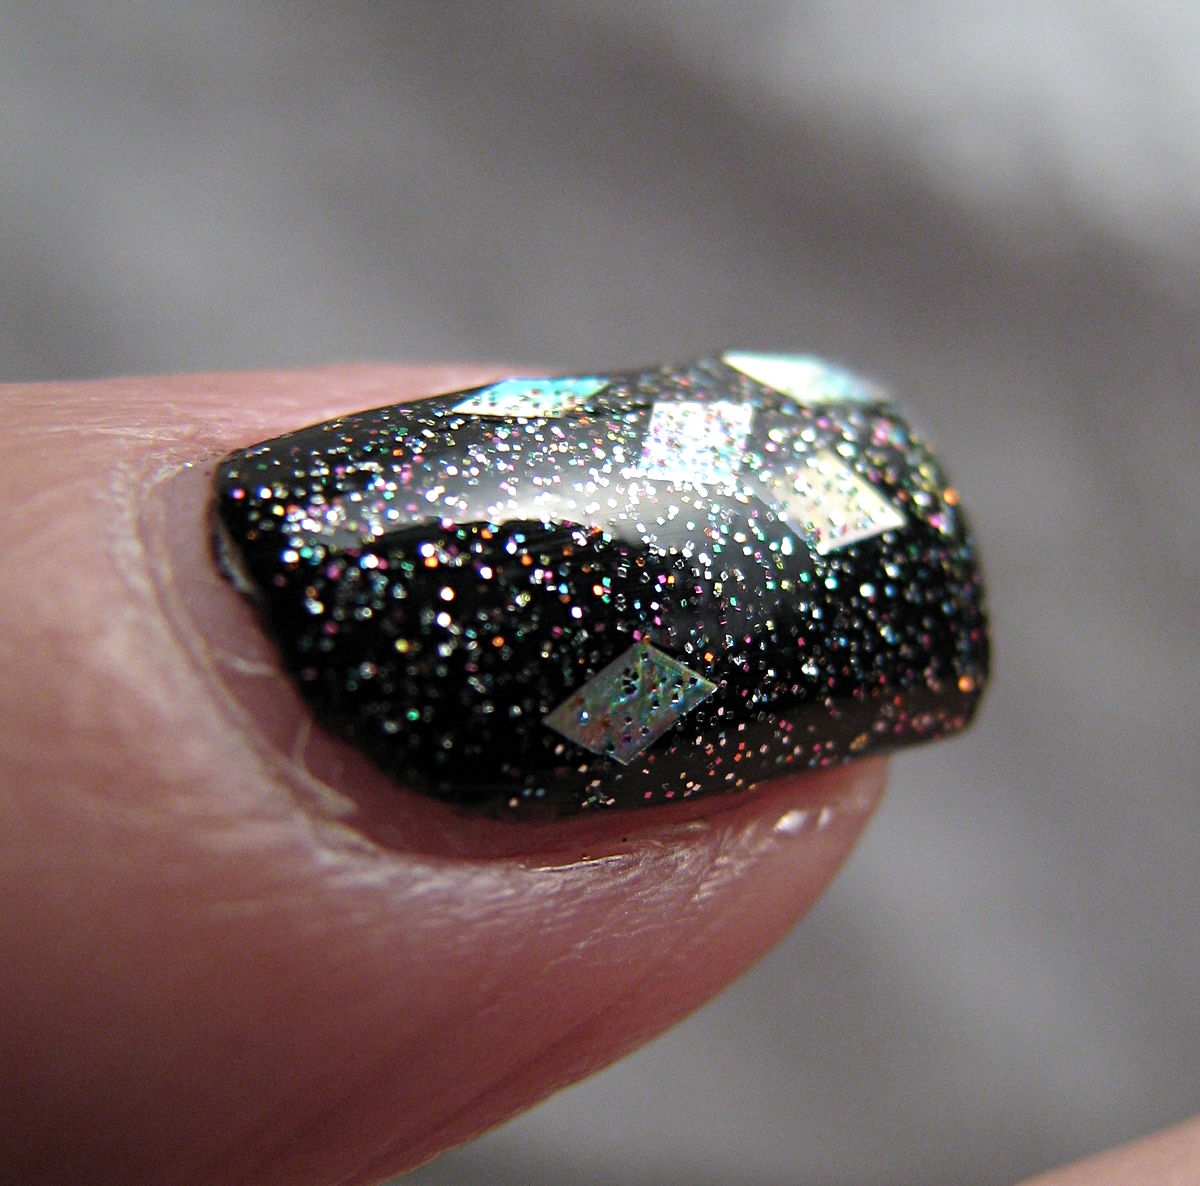
For my full manicure, I've topped 2 coats of China Glaze's Mahogany Magic with 2 coats of SC's I Dream in Jewels.  IDIJ is a gorgeous gold and red micro glitter with larger diamond-shaped holographic glitter in a clear base.  I have to say, on the whole, I'm really pleased with the amount of glitter in this collection.  Most of the polishes had good coverage in 2 coats.  IDIJ is totally packed with glitter and I love the color combo!  My boyfriend said, "Wow!  It looks like the Solid Gold Dancers!" and then proceeded to ask me if I knew who they were lol (note to my younger audience: do not ask me who they are, you'll make me feel old.  That's what they invented Google for!)


I tried my best to get a good macro shot of each polish, I hope you can at least get the idea of what they look like!


 Now on to the rest of the collection!  (All SC Diamond Lust polishes shown in 2 coats)


 Crystal Clear (shown over 2 coats of Deborah Lippmann's Edge of Glory) is chock full of holographic glitters in hexes, diamonds and bars.  I didn't even see the bars until I got it on my nails.  Application was good, although I did have to fish a bit for the diamond glitters.  CC is a real show stopper; super sparkly and very interesting to look at.


 Shine On Me (shown over 2 coats of Wet 'n' Wild's Tickled Pink) contains pink holographic diamond-shaped glitter, pink holographic and fuchsia micro glitter, and larger pink hexes.  The color and glitter are great, but the formula on this one was a little gloppy for me.  Maybe it's just my bottle, but I was less impressed with this one than some of the others in the collection.  The smaller glitter is sparser than IDIJ, for instance, and the diamonds and larger hexes didn't want to spread nicely over my nail.  It's still a lovely polish, but  not my favorite.


Rags To Riches (shown over 3 coats of NYC's Tudor City Teal) is my second favorite of the collection.  It's basically a green version of Shine On Me, with green holographic diamonds and hexes and green and gold micro glitter.   The holographic finish on these glitters really pops!  Application was good on this one and it spread out nicely over my nail.


Scene Stealer (shown over 2 coats of Wet 'n' Wild's Tickled Pink) seems to be the front runner as favorite of the collection judging from the blog posts I've seen so far.  SS has pink holographic diamond-shaped glitters, small pink holographic hexes, and fuchsia micro glitter.  It really is a pretty polish with plenty of sparkle.  Coverage was good in 2 coats and application was great.


Watch It Shine (shown over 2 coats of Deborah Lippmann's Edge of Glory) is the second silver holographic topper of the bunch.  Silver holographic diamonds and silver holographic micro glitter packed into a clear base, WIS is another stunner.  The tiny glitters really look like diamond dust and I can see this one working over a lot of different base colors.  Again, easy application and good coverage in 2 coats.


Sinful Colors Diamond Lust polishes retail for $2.99, which is $1 more than the regular collection.  If you love glitter, these are totally worth it.  I'm excited to have them all in my stash and am hoping to try out a few jelly sandwiches with them soon!

What do you guys think?  Have you purchased any of these yet?  I'd love to hear from you!

Thanks so much for reading!

Thursday, April 25, 2013

JulieG's Frosted Gumdrops Collection


Howdy, everyone!  I had planned a completely different manicure to blog about today, but after I got finished with this one, I just had to show it off!  There was a really great Groupon deal a few weeks back for the new JulieG Frosted Gumdrops Collection.  I was lucky enough to snag one of these which included all six of the polishes for $12.99 plus $2.99 shipping.  It was a pretty good steal!  I'm actually unfamiliar with JulieG's polishes as I believe they're only sold at Rite Aid and there aren't any of those around here.  So, I have to say, I was pleasantly surprised with these.

 *All product was purchased by myself and all opinions are my own and unsolicited*


Julie G's Frosted Gumdrops are glitter polishes with a textured finish, similar to O.P.I.'s Liquid Sand polishes.  As pictured above from left to right, the polish names are Tangerine Dream, Sugar Rush, Hot Cinnamon, Crushed Candy, Blueberry Fizz, and Rock Candy.  And here's what I did with them:


I started with 3 coats of Hot Cinnamon on every nail but my ring finger.  I would have been fine with 2 coats, but I did the third just to make sure everything was covered.  On my accent nail, I did a striped rainbow with all 6 of the polishes.  I have to say, the sparkle on these is pretty spectacular!  I wish my camera would have captured it better.  You can definitely see the texture and it is really similar to the Liquid Sand polishes I've tried.

 *All product was purchased by myself and all opinions are my own and unsolicited*


 My one complaint on these polishes is that they seem to take a long time to dry, and, since you lose the textured effect with a top coat, there's no real way to speed it up.  Just be aware of the possible smudge factor if you get impatient with these.  I think the sparkle payoff was worth the extra dry time for sure.


I know there are folks who really hate the texture trend, but I kinda dig it.  It's something new and fun to play with.  Would I want to wear it every day?  No.  But it's fun for a change.  What are your thoughts on texture polishes?  Love them?  Hate them?  Tell me all about it!

Thanks so much for reading!

 *All product was purchased by myself and all opinions are my own and unsolicited*


Wednesday, April 24, 2013

ABC Challenge: P is for Painted Sabotage


Howdy, everyone!  Another Wednesday evening, another ABC Challenge post!  Today's letter is "P" and I've got a new-to-me indie brand to show for it.   I found Painted Sabotage via Manicure Addict (whose blog you should definitely be reading if you aren't already) a few weeks ago.  I immediately fell in love with Gargle Blaster and knew I had to have it!


Nice little bottle shot there, but on to the nails, yes?


GB has everything you could want; fuchsia squares in two sizes and small fuchsia hexes, silver hexes in three sizes,  micro glitters in silver and gunmetal all in sheer minty blue/green base with a slight shimmer.  Seriously, this polish is so pretty!  It's quite sheer, but application was a breeze and it built up nicely in 3-4 coats.  I used it here with no undies and you can see in the photo below the depth this beauty has.


I used Sinful Color Outrages (not a misspelling, that's how it's printed on the bottle) for the accent nails and half moons here.  Outrages' creamy fuchsia shine was a perfect complement to GB.


I'll be picking up a few more Painted Sabotage polishes when my beauty budget opens up a bit.  Speaking of which, did anyone snag one of the Allure Beauty Boxes this time around?  I was super lucky and snuck one in, so be expecting a review on it in a few weeks!

Thanks so much for reading and be sure to check out the other lovely ladies in the ABC Challenge, you can find them via the links below!


Monday, April 1, 2013

Flying Dragon Sandwich


Howdy, everyone!  I hope you've had a few laughs on this April Fool's Day.  I've seen some great stuff going around, including Zoya's Grassy Nails and GrubHub's new KibbleHub (although, to be fair, I don't know for sure that KibbleHub is an April Fool's Joke lol).   I'm not much of a practical joker myself, but I do enjoy a good one played every now and again.

Anyway, today I have a quick manicure for you.  Yet another sandwich.  I keep finding these great jelly and neon shades and all I can think of is how great they'd look sandwiched, so sorry if you find them repetitive!  Here's the latest one:


This is 2 coats of China Glaze Flying Dragon, followed by 2 coats of Sally Hansen Complete Salon Manicure in Mermaid's Tale and topped with another coat of Flying Dragon.  As far as the controversy with China Glaze crediting bloggers goes, let me just say that it sucks.  I'd like to say that I was going to throw out all my CG's and never use their products again, but I bought this one (and all my others) well before this issue happened and I can't see the use of not using product I already own.  I do feel for the bloggers whose photos were used without credit and I hope that CG will step up and compensate them, although it seems like they're taking the "ignore it and it will go away" stance.  This will factor in to future purchases from CG, as I don't like to support those types of business practices, but I will continue to use the products I already have.
 

Whew! Now that I got all that out!  Flying Dragon is a fuchsia neon with tons of fuchsia and bright blue micro glitters.  Application was fairly easy, although it will bald if you try to apply a fresh coat over a not-quite-dry coat on the nail.  The finish of the polish alone is very matte and gritty and not really pretty at all, but a coat or two of Seche Vite (or your preferred top coat) will greatly improve matters.  This is one of those polishes that has me staring at my nails throughout the day...really lovely.  Mermaid's Tale is transparent navy blue base packed with blue and green hex glitters and small blue micro glitters.  I just picked up MT at Walgreen's the other day.  (If you check out the displays, you may find a $2 off coupon for any Sally Hansen product, so keep your eyes peeled!)  MT was a good choice for this sandwich, the glitters add a lot of depth to the finished look.

Thanks for reading and don't forget to enter my Sinful Colors Giveaway!

Tuesday, March 5, 2013

ABC Challenge: I is for Iocaine Powder and Irish Green


Howdy, everyone!  It's Wednesday and that means it's time for another ABC Challenge!  Today's letter is "I".  In my last post, I mentioned I might be using a new polish I got from LynBDesigns, and, not being one to go back on my word, I have! 


I've done another green mani...I didn't realize I did that many of them, but I guess I do lol  Anyway, here I've started with 3 coats of Sinful Colors Irish Green.  I passed IG over for a good long while because I didn't realize that it was a jelly!  Sinful Colors should really change their labeling to indicate what type of polish is in the bottle.  IG is a super bright, super squishy green jelly and it's just perfect for St. Paddy's Day just around the corner!  


On top of IG, I've added a coat of Iocaine Powder from LynBDesigns.  As I'm sure most of you know (and if you don't, you should really watch this movie!), Iocaine Powder comes from the movie The Princess Bride.  It's one of my all-time favorites and when I saw LynBDesigns had a collection inspired by the movie, I knew I had to have it!  IP is a holographic glitter topper bursting with micro-glitters and itty bitty flakies...some super sparkle power here!  As with the other LynB's I've tried, IC had a great formula.  I've used only one coat here on top of the green and you can see how great the sparkle is.


I hope you'll take a few minutes to check out the other ladies doing the ABC Challenge.  You can find them via the thumbnails below.  As always, thanks so much for reading!!