Pages

Showing posts with label Halloween nails. Show all posts

Tuesday, October 14, 2014

Indie Spotlight: Spellbound Nails Can I Keep You?

*Spellbound Nails products provided for honest and unbiased review.  All other products mentioned were purchased by me*

Hello, hello!  I'm continuing with the Halloween theme today with a gorgeous Spellbound Nails polish.  Ashley, owner and creator of Spellbound Nails, has a created a beautiful Halloween collection inspired by the movie Casper.  Along with Hocus Pocus, Casper is a movie I make sure to watch around Halloween every year...it's just so cute!  So when I found out Ashley was making a polish collection inspired by it, I knew it would be really special.  The collection is titled Give Up the Ghost and contains 6 polishes, 5 of which glow in the dark.  I've got one of these to show you today and it just so happens to be my favorite of the collection!


Can I Keep You? is obviously (at least if you've seen the movie) inspired by the line Casper whispers to Kat after they first meet and later when he becomes human for the night.  Can I Keep You? is an amethyst crelly base with bright yellow stars and hexes and orange shreds.


There's no two ways about it, this polish is just fun!  You guys know I was sunk at purple, but I love the glitter combo in it as well!  The formula here is also good, opaque in 2-3 coats (I'm wearing 3 here with one coat of Seche Vite on top) and the glitters were quite easy to get out of the bottle.  Please ignore the bubbly you see in the macro shot...that was an application error (cuz I was going too fast!) and has nothing to do with the polish itself.  If you give a bit more time between layers to let the polish dry, you won't have an issue.  I know better, but I was just in a hurry to get this lovely on my nails!
 

In addition to beautiful color, fun glitter, and a great formula, Can I Keep You? has a super strong glow in the dark effect!  My poor camera isn't well equipped to deal with photos in the dark, but even it grabbed a pretty good shot of the glow on this beauty.  
 
  
 Ashley's creations never let me down and, if you're looking for a fun Halloween collection to try out this year, I highly recommend the Give Up the Ghost collection!  Can I Keep You? is currently available on the Spellbound Nails site for $9 for a full size bottle.  If you love the whole collection, you can nab it in full size for $53 or mini for $27 (which is a great deal on both counts!).  Be sure to check out Spellbound Nails on Facebook to keep up to date on new releases, swatch photos, and other important info!

Thanks so much for reading and I hope you enjoyed the post!

Wednesday, October 30, 2013

Barielle Halloween Manicure Contest Entry


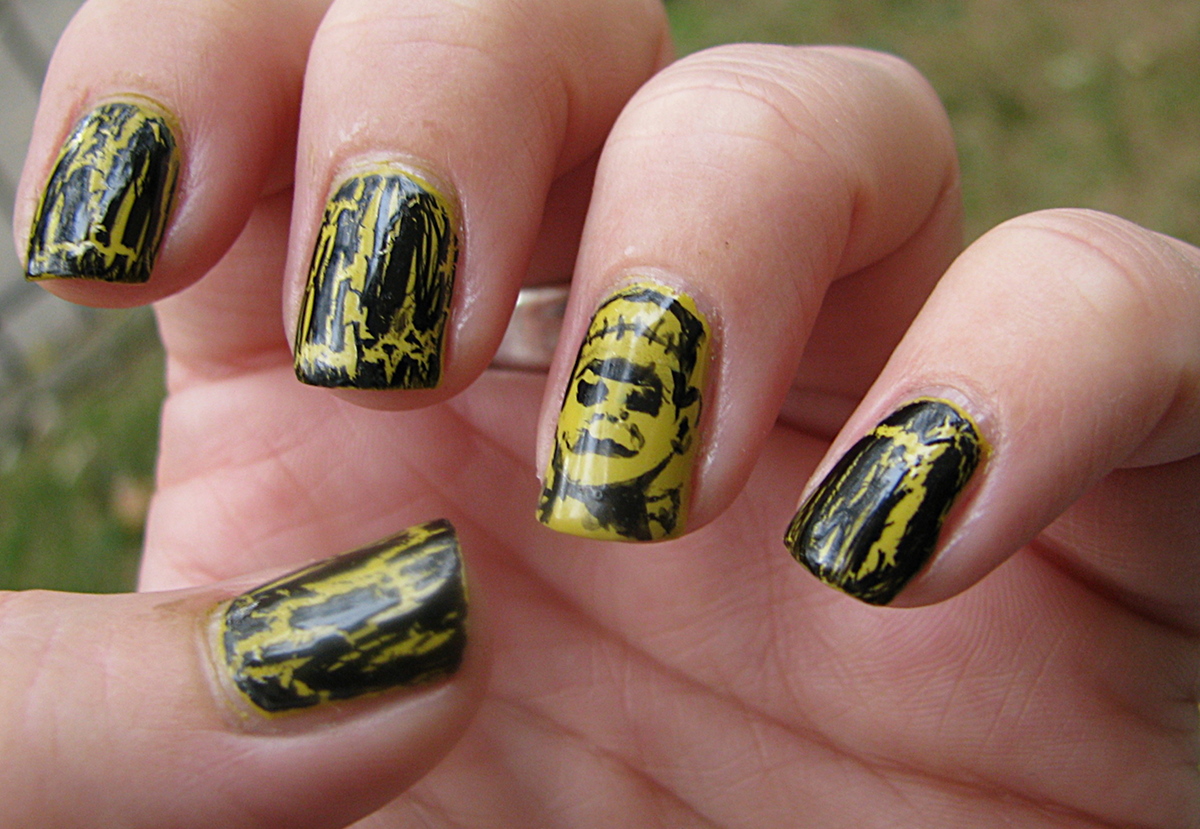
Heya folks!  Hope everyone is ready for Halloween!  I've got one last spooky manicure for the season.  I've entered this one into Barielle's Halloween Manicure contest so you all know what's coming next lol  If you'd like to vote for my version of Frankenstein and his bride, you can click here and "like" the photo.   If you'd rather not vote, that's totally fine as well :)  I hope you enjoy the manicure just the same!


I used all Barielle polishes for this one and, as I don't have very many and none in very "Halloween-y" colors, this was a bit difficult.  I used Lemondrops, Purple Hearts, and Sweet Addiction.  I'm quite proud of Franky, but I wish I'd have gotten more of the Bride's hair in there so you could tell better who she is.  The rest of my nails are water marbled in different colors.

Voting is only open through Oct. 31st at noon, so I'm running pretty late with this one but I wanted to give it a shot nonetheless.  Again, you can vote here by "liking" the photo...pretty easy, peasy!

Thanks so much for reading!

Wednesday, October 23, 2013

Halloween Slashers, Monsters, Serial Killers, Etc. Manicure


Hello everyone!  As we edge closer and closer to Halloween, I'm seeing some fantastic nail art and manicures out there!  I decided to try my hand at another Halloween nail art contest, this one sponsored by FancyDawn, You Polish, and Lace and Lacquers.  The contest is accepting entries until Friday, Oct. 25th and there are 3 categories; Halloween manicure, Halloween makeup, and Overall Most "Liked".  So, I've got two chances to win, the first in the Manicure category based on judging and the second chance in the Overall category by asking everyone I know to go to FancyDawn's facebook page and "like" my entry...ahem, ahem...hint, hint.  :)  I do hope you guys will vote for me if you like my work!  If you'd like to vote by "liking" this photo here, you'll be my very bestest friend, ever!.  And, after all that, here's what I did!


I hope these guys are all pretty recognizable to you!  I went with a Halloween bad guy theme, covering some of my favorite villains from horror movies.


I'll do a quick lineup for you, in case you can't tell who some of these guys are (I'm also linking to the source photos, so you can see how far off I am lol).  On my thumb and affectionately termed "Pinhead" is the chief Cenobite from the Hellraiser franchise. Pinhead has always had a "good guy" persona lurking underneath his evil facade for me, owing to his letting the girl go in the first movie...that said, I still wouldn't go messing with suspicious puzzle boxes, just in case!

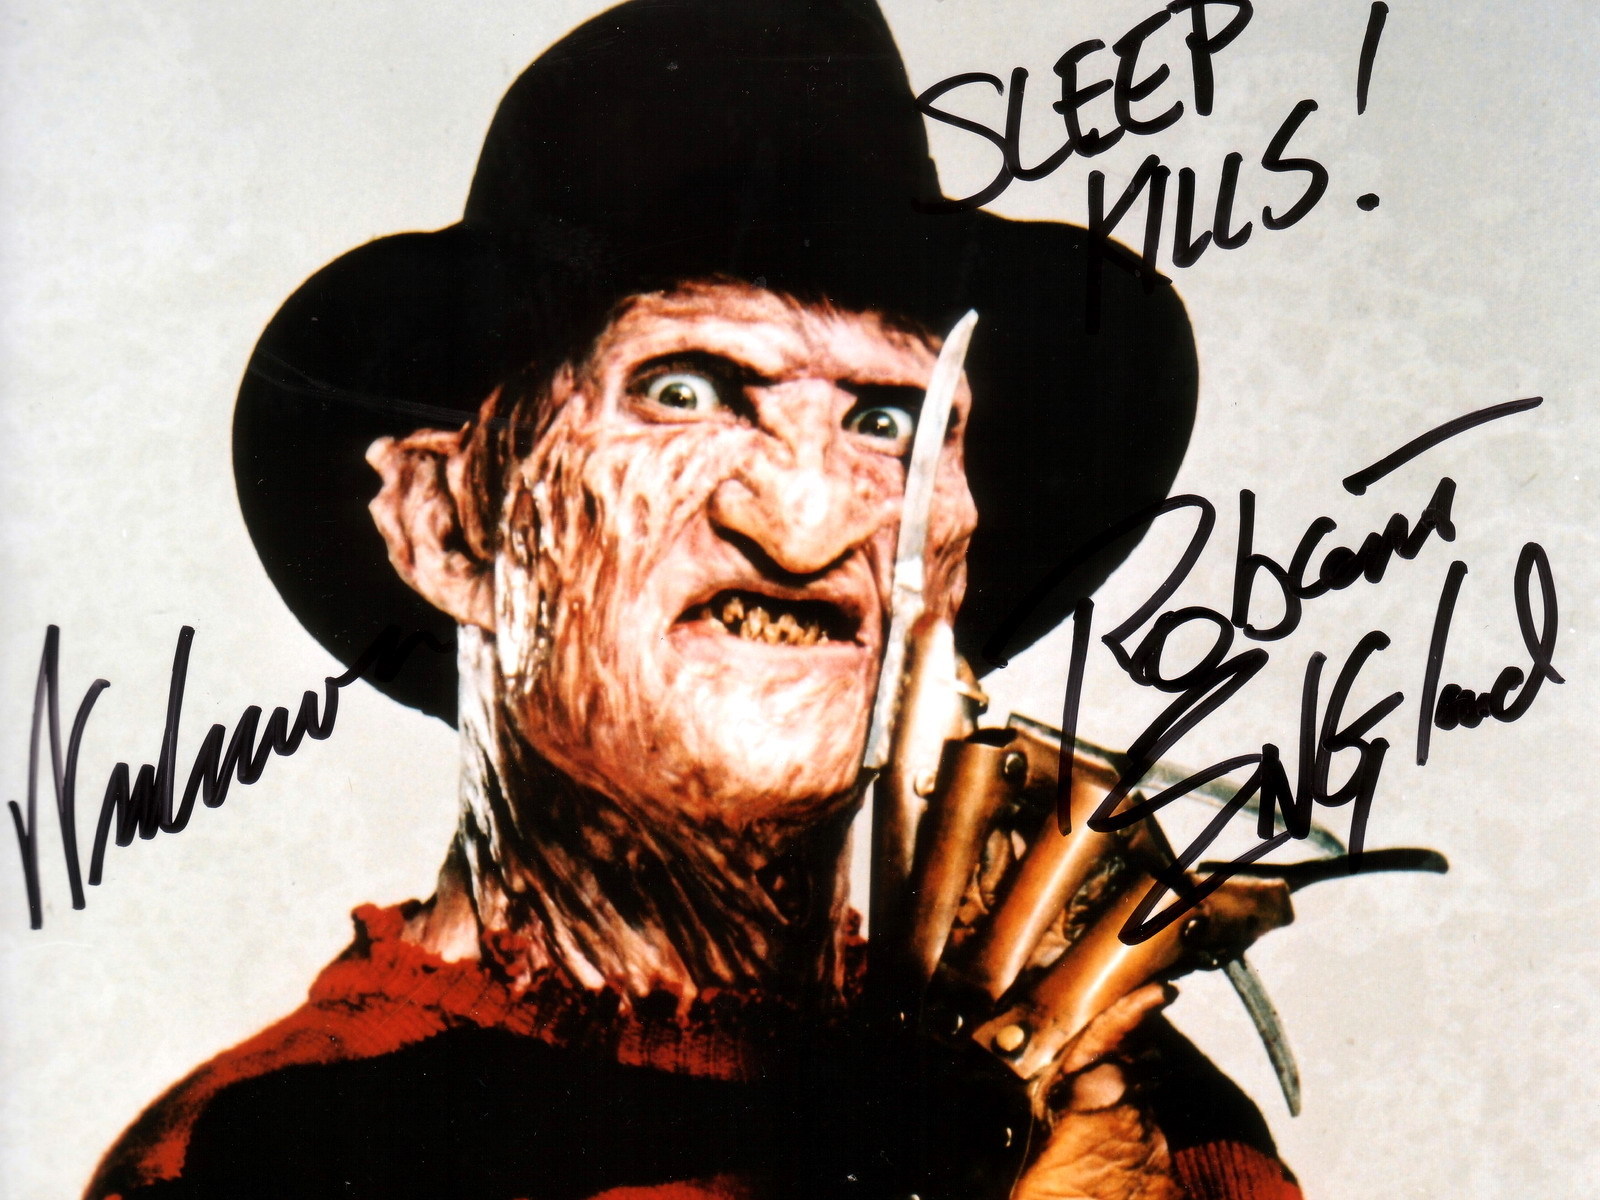
My index finger has become the host for my all-time favorite dream-invading psychopath, Freddy Krueger!  Nightmare on Elm Street made everyone who saw it afraid to sleep and validated my suspicion that little blond pigtailed girls in white dresses are a bad omen.  Freddy has always been a favorite of mine because I love camp and Krueger's dry humor sticks it straight to my funny bone. As you might suspect, given his ornery nature, Freddy gave me the most trouble.  I believe I spent a total of 2 hours on that nail alone, what with starting over 3 times!  He's still not perfect here, but I did manage to get his sneer and his knives down and, overall, I'm proud of him.


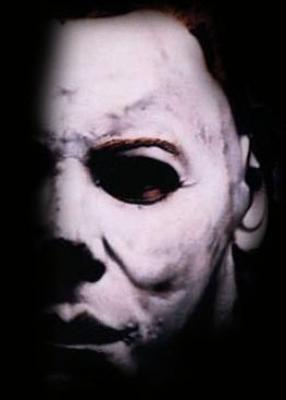
Michael Myers, of Halloween fame, has taken up residence on my middle fingernail.  While he has the least amount of personality as a character in this group (imho), this is my favorite design of the 5. That stark black and white contrast is hard to beat.  I mean, I know he's scary what with the whole "never dying" thing, but his soul is just as blank as that Will Shatner mask and throughout TEN movies, the man never says a word.

My next favorite design is Mr. Vorhees from Friday the 13th, who has set up shop on my ring finger.  The archetypical "Momma's Boy",  Jason's iconic hockey mask was originally worn by his Mommy Dearest as she hacked her way through the campers she believed responsible for her sweet baby boy's drowning.  The first Friday the 13th can boast one of the first "twist" endings in horror cinema history, though Jason wins second place in the non-verbosity category.


This brings us to my pinky, a.k.a. "Ghostface" from the Scream movies.  The only killer on this list that is actually an inanimate object, the mask from Scream was worn by many different crazed murderers and won Wes Craven acclaim for "reinventing" the genre; although killing off your top-billed star (Drew Barrymore) in the first scene is definitely a nod to the all-time horror master, Alfred Hitchcock (Psycho, with Janet Leigh).  Scream proved that will all the high-tech nonsense horror creates these days (Shark Night 3D, anyone?), a simple masked maniac with a knife and no apparent motive is still pretty friggin' scary!

Alright, after all that, I hope you all enjoy the manicure!  Everything was painted with polish directly on the nail.  I'd include a list, but I used so many colors I'm not even sure anymore which ones lol  If you do have a moment and feel like it, I'd love it if you went and voted for my entry, by "liking" this photo on FancyDawn's Facebook page.  I appreciate you taking the time to read, though, even if you don't vote!

Thanks so much!


Sunday, October 13, 2013

Incoco Halloween 2013 Fright Night Collection

*Incoco nail strips received as a giveaway prize.*

Howdy everyone!  So sorry I've been non-post status for a couple of days!  Big things have been afoot, not only at Over the Top Coat, but in my personal life as well.  Most everything has been good though, it's just been time-consuming and I've been too tired to stay up late and post like I usually do.  However, I'm back and have lots of exciting things planned in the next few weeks...so yay!  :)

To start, a few weeks ago, I entered Incoco's Pin to Win contest and won their new 2013 Fright Night collection!  I've seen these nail strips popping up on lots of blogs lately and was very excited to have a chance to try them out.  Plus, their Halloween designs are just so adorable, I'm thrilled to have the chance to give them a try!  Today, I've got 3 of the 4 Fright Night designs to show you.  I'm saving the forth for something later so, don't fret!


We'll start with the namesake of the collection, Fright Night!  This pattern shows a silhouetted haunted house/cemetery scene on a glittery orange background.  Classic, spooky Halloween and I love it!  Incoco's strips are very similar, at least in my view, to the Sally Hansen nail polish strips.  Like SH, these are actual nail polish formed into a strip, rather than plastic or some other weirdness.  Because of this, they tend to stick better to the nail and have less issue with bubbling or creasing.  The idea is to have the look of nail polish, without the cleanup or dry time of polish.


Application is fairly easy.  There are 16 strips in each packet, divided into 2 sets of 8 different sizes.  You select the size that you feel best fits your nail, peel off the clear cover and then peel the strip itself from the white backing.  Carefully pull the silver tab off the end of the strip and then place it on your nail.  There is some stretch to the strip, so you'll want to gently pull it tight across your nail and then press the strip firmly into place.  Fold the end over the edge of your nail and file the edge lightly in a downward motion to remove the excess strip.  If you have shorter nails, the strips are double-ended so you could use the excess on another nail if the fit is good.


According to the packaging and website, one Incoco nail strip manicure will last chip-free up to 14 days.  I do wish I could test that for you guys, but I change my polish too often to devote 2 weeks to one mani.  The designs do seem durable and last through showering, handwashing, and regular wear just fine. Incoco's strips do have the look of complicated nail art in under half the time which is pretty great.  They also offer a wide variety of strips including pedicure and French manicure.  So if you're like me and really hate painting your toenails, Incoco's strips could be a good solution.


The second manicure I have to show you uses Spooktacular (ghost pattern on thumb and pinky) and Bone-Rattling (skull pattern on index and ring finger).   Both of these patterns glow in the dark.  Unfortunately, my camera does not do well with capturing that effect so I don't have a photo to show but they do, indeed, glow! 


I've talked a bit about what I like about these strips so let me tell you some of the things I'm not so fond of.  First of all, the sizing seemed a bit large to me.  I don't feel like I have super narrow nail beds, but only about 3 of the 8 sizes fit ALL of my nails well.  So that means I have to make 6 strips fit all 10 nails unless I want to try to cut to size.  I know Incoco is trying to fit as many people as they can with these, but a few more narrow sizes would be nice.


Also, since these are real nail polish, once you open the package that's pretty much it.  The strips dry out in air and lose their ability to stick to the nail.  I think you could probably figure out a way to use the extra by pressing them into wet polish or something, but the shelf life just isn't that great.  One packet of nail strips is good for one manicure.  And since I can use less than half of them, it seems a bit wasteful.  Given the nature of the product though, I'm not sure how they could resolve that issue.  Nail polish dries out in open air.  If it didn't, none of us would be painting our nails at all and what a sad world that would be!

Overall, I do like these strips a lot.  I think the adorable designs and variety of styles more than make up for the few issues I have with them.  They're an especially great way to get the look of difficult nail art without the time, mess and fuss. 

*Incoco nail strips received as a giveaway prize.*

Incoco's nail strips are price from $8.99 to $9.99 for one 16 strip set.  Base coat and top coat are included in the strip so there's no need to use either.  I typically do use a top coat however mostly out of habit, not for shine or durability.  You can keep up with Incoco's news via their Facebook page or blog.

Have you tried Incoco's strips?  What did you think of them?

Thanks so much for reading!

Thursday, November 1, 2012

Nail-aween Challenge 10: Halloween Nails


Howdy, everyone!  I'm a day late on this post.  Time got away from me over the last couple of days.  However, I do promise that this mani was finished and worn before the end of Oct. 31, 2012. Therefore, it still counts for the Nail-aween Challenge!  The final challenge was to do any Halloween inspired manicure of your choice.  Here's what I came up with:


I started with a gradient using Wet 'n' Wild's Wild Shine in Sunny Side Up and Sally Hansen's Complete Salon Manicure in Purple Pulse.  When I got my Halloween Julep box this month, they sent me some free Halloween-themed nail decals from Alex Cole.  This manicure seemed like a good time to try them out.  So all the black silhouettes you see here are decals.  I liked them, they were easy to use.  However, a lot of the black ink seemed to rub off as I was working with them and they didn't actually stick to the nail by themselves.  I'd recommend placing them onto an almost dry coat of polish or base coat so that the tackiness of the polish gives them something to stick to.  On my thumbnail, I added some bat-shaped glitter from a Halloween-themed glitter kit I found at Michael's.  I finished this manicure off with a coat of Flashy by Finger Paints, a holographic top coat.

This was a fun manicure, but I'm a little disappointed with how it turned out.  Oh well, you win some, you lose some.

The Nail-aween Challenge was so much fun to participate in and I loved seeing what everyone else came up with.  I'm hoping to find a holiday themed challenge to participate in during December, although where I think I'll find the time, I'm not sure.  Please stop by the other challenge participants' sites to see how they completed their Challenges.  You can find them here:


As always, thanks so much for reading!

Monday, October 29, 2012

Nail-aween Challenge 9: Pumpkin Nails


Howdy, everyone!  Well, we're almost down to it...it's October 29th.  I can't believe how this month has flown!  This is the second to last Nail-aween challenge and it's pumpkin nails!  I've seen quite a few really great pumpkin manicures the last couple of days.  I decided to just run with a simple design on these.  Whaddya think?


I started with 2 coats of Nicole by O.P.I. in My Lifesaver, a beautiful sky blue creme.  I used Julep's Parker as a base color for the pumpkins and then topped it with KleanColor's Chunky Holo in Poppy for a bit of depth.  Essie's Mojito Madness and Wet 'n' Wild's FastDry Sagreena the Teenage Witch make up the stems and leaves.  I used striper polishes in white and black for the details.  

All in all, I thought this turned out ok.  Is it my favorite Halloween manicure?  No.  Was it fun to try something different?  Definitely.

One more look at these guys:
 

And you only have a few more days to check out the other participants' work in this challenge.  Here's the list again, please visit them and show 'em some love!


Thanks so much for reading!

Saturday, October 27, 2012

Nail-aween Challenge 8: Witch Nails


Howdy, everyone!  I know it's late, but I really wanted to get this post up before I turn in.  I've got a really cute manicure and it just couldn't wait til daylight!  The next Nail-aween Challenge is Witch Nails.  I dug around online and found a couple of fun ideas that I wanted to re-create.  You can find one of the originals here and the other link just takes me to a tumblr page.  If you know who's photo that is, let me know so I can give credit for the lovely artwork!  Here's my take:


I decided to go with a bright green background, but I didn't want it to be a flat color so I started with 2 coats of Sally Hansen Hard as Nails in Limestone topped off with 2 coats of Electric Slide by Nina Ultra Pro.  Limestone is a citrus-y green creme and Electric Slide has holographic and gold glitter suspended in a neon green base.  I used black acrylic paint to create the witch profile on my thumb and the boots on my middle and ring fingers.  The stripes on my other nails were done with a black striping polish.  I finished off the look with boot button details in Orly's Luxe.  

This is one of my favorite manicures so far from this challenge.  The color combo is fun and striking and the artwork turned out so well!

...more after the jump...

Thursday, October 25, 2012

Nail-aween Challenge 7: Spider Nails + Tutorial


Howdy everyone!  Goodness this month is flying by, isn't it?  It'll be Halloween in less than a week!  I'm going to show you my Nail-aween Challenge manicure and then I'm going to give you a tutorial on one of the techniques I used to get the look.  The 7th Challenge is Spider Nails and here's what I came up with:


These didn't turn out quite the way I had hoped and I'm particularly unhappy with the orange spiders.  But my blog is as much about my successes as my failures, so I'm putting it up here.  I used Wet 'n' Wild's Wild Shine in French White Creme and Black Creme and then Julep's Parker for the spiders.  Parker is a great orange creme for Halloween.  Stay tuned after the jump for the tutorial on the background faux water marbling.

Monday, October 22, 2012

Nail-aween Challenge 6: Frankenstein Nails


Howdy, everyone!  Trying to get back into the groove of posting more regularly again, since I've been such a slacker lately lol  Halloween is fast approaching so I've got to get these challenge posts done!  Today's manicure is an answer to challenge 6 of the Nail-aween Challenge; Frankenstein nails.  I wanted to do something different than just green nails and black stitches, but, honestly, there's not a lot of new and different ways to do Frankenstein's monster.  He's so iconic that I just decided to showcase him.  Here's what I came up with:


I started with 2 coats of Julep's Alma-Trina Turk which is one of the polishes I received in my Trick or Treat box from them.  ATT is a very odd sort of color (perfect for Halloween) somewhere between mustard yellow and pistachio green creme.  Application was great, it was almost opaque in one coat.  I used O.P.I.'s Black Shatter on the rest of my nails.  The Monster's portrait was done in black acrylic paint.  I'm pretty happy with this although I wish I could have come up with something a bit more interesting for my other nails.  But, honestly, I was just kinda tired lol

Here's a close up of Frankenstein's Monster:


I'm hoping to get Challenge 7 done tomorrow, complete with a tutorial, if I have time and can figure it all out the way I want it.  So please check back in to see all of that!  Also, check out these other nail artists who are participating in the Nail-aween Challenge.  They are all awesome and deserve some love!
 
 
Thanks so much for reading!

Tuesday, October 16, 2012

Nail-aween Challenge 5: Ghosts & Goblins


Howdy, everyone!  I know it's been a few days since I posted but I've had a bit going on.  Nothing I want to share just yet, but who knows what the future will bring? :)  Anyway, I'd been wearing my Game Day Manicure from Saturday until today which was just no good!  I had to change it up so it was on to the next Nail-aween Challenge, Ghosts & Goblins.  I racked my brain to come up with something fun and different for this one.  I knew I didn't want "bed sheet" ghosts, not that there's anything wrong with them but I wanted something spookier.  I also wanted to incorporate a bit of the goblin aspect, too.  Here's what I came up with:

...more after the jump...

Thursday, October 11, 2012

Nail-aween Challenge 4: Mummy Nails


Howdy, everyone!  Sorry for my absence but I've been sick.  I managed to catch the cold that's been going around, but I'm on the mend (I hope!).  You know I had to be sick because I'd been wearing the same manicure for 3 days!  Bleh!  I need change!  Enter the Nail-aween Challenge #4; mummy nails!  I decided to go the traditional route with the mummies, partly because I've never done them before and partly because I'm not back to 100% yet and I'm still pretty tired.  Anyway, here's my take:


I started with 2 coats of Essie's Yogaga (which will look familiar from  my "bloody nails" post) and then drew in some "bandages" with Sinful Colors Bad Chick, a white striper polish.  I used a dotting tool and January by Julep for the red eyes, and a black striper polish for the pupils.  I think they turned out pretty cute!  Here are a couple other views:


Hopefully I'll be able to keep up with posts now that I'm feeling better so be sure to check back.  Saturday is game day so you know what that means...K-State nails!  And, if you're not into that (because I'm aware that most of you don't share my Purple Pride), I'll be continuing on with the Nail-aween Challenge, including an upcoming tutorial, all the way til the 31st!

Thanks so much for reading!

Sunday, October 7, 2012

Nail-aween Challenge 3: Bloody Nails


Hello again!  I know this is 2 posts in less than 24 hours, but I couldn't help myself.  I got done with the 3rd Nail-aween challenge and it turned out so fantastically that I had to share right away!  The challenge is "Bloody Nails".  I had a hard time deciding if I wanted to do a drippy red french manicure or really grungy zombie nails.  I decided instead to try a new technique. Without further ado:


I splattered 'em!  I've seen this technique around in the blogosphere and decided to give it a shot.  I started with 2 coats of Essie in Yogaga, a greyish beige creme.  When that was dry, I cut a straw into 3ish inch pieces and dipped one end into Sally Hansen Diamond Strength in Chocolate Kiss.  CK is a perfect deep red with brown undertones for blood.  Turned out quite convincing, I thought!  I made sure the dipped end was totally covered with polish and then I blew a sharp breath into the non-polished end of the straw.  As you blow, the polish sprays out and splatters randomly all over your nail.  It took a few puffs to get the right pressure going, but it was easy after that.  Messy, but easy :)  A word to the wise, do tape off your nails.  Otherwise, clean up will take forever.  On my left hand, I thought I'd be smart and just slather on cuticle oil as a barrier against the excess polish.  Yeah, that didn't really work.  Tape may take a bit longer to apply, but it's a lot cleaner.

*more after the jump*

Friday, October 5, 2012

Nail-aween Challenge 2: Matte Dotticure


Howdy, everyone!  Can I get a "hooray" for Friday?!  I had the day off today so I took myself down to my favorite brunch spot for some pecan apple pancakes and then to Target for some afternoon shopping.  And now I'm tuned into my favorite Friday night TV show...Ghost Adventures!  I may have mentioned that I love Halloween.  Well, I pretty much love anything spooky or supernatural.  GA is quality entertainment value, imho.  Zak, Nick and Aaron crack me up on a regular basis and I will admit I still can't watch the Bobby Mackey episode all the way through.  I'm so sad that I didn't know they were here in Chicago during the NATO summit.  It would have been worth facing the rioters to meet them in person :)

Ok, ok, on to the nails!  The second challenge for Nail-aween is a matte dotticure (I think it looks better spelled this way than "doticure", but I'm not sure which the correct way is?).   I remembered seeing a manicure awhile ago that used dots to a cute, spooky effect and so I decided to recreate it.  Take a peek:


I'm calling this the "I always feel like somebody's watchin' me" dotticure.  I started with 2 coats of MAC's Black Enough? which has a matte finish.  I used a larger dotting tool and Sinful Colors in Pull Over for the yellow irises then a small dotter and BE again for the pupils.  Aren't they cute??  Here's another look:


Unfortunately, I'll have to change these tonight as tomorrow is a K-State game and I can't jinx them with non-purple nails, but I wish I could wear them at work so I could get some folks' reactions.  I might have to redo this mani at a later date.

I will, of course, be posting the aforementioned K-State nails most likely tomorrow night.  I know I've done a couple of those already, but I love my Wildcats and tomorrow is a big game.  The Sunflower Showdown between K-State and KU is always a big deal.  KU isn't fantastic this year, but knowing the underdogs as we K-State fans do (because we usually are the underdogs), it would be stupid to underestimate them.  In any case, EMAW!

Thanks for reading!

Thursday, October 4, 2012

Nail-aween Challenge 1: Water Marble


Howdy!  As promised, I have my first Nail-aween Nail Art Challenge challenge for you today.  Wow, that was a mouthful!  The first challenge is a water marble.  Everyone loves how water marbles look and everyone hates doing them.  The technique is time-consuming, polish-consuming, and sanity-consuming.  So I cheated.  Here's a photo:

*more after the jump*

Tuesday, October 2, 2012

Glitter Goblin Manicure


Hello, hello!  I hope everyone is having a great week so far.  This is going to be kind of a long post because I have a lot of things to share, including a new manicure.  I made a trip to Ulta over the weekend to take part in their Buy 2 Get 1 Free sale, so I'll be showing you a new China Glaze glitter.  But we'll get to that in a minute.

First of all, I thought I'd want to take a break after doing the 31 Day Nail Challenge, but it turns out I miss the prompts!  Whodathunk?  I'm super excited to announce that I'll be participating in datyorkLOVES Nail-aween Nail Art Challenge during the month of October.  This challenge is a bit different in that it's self-paced, meaning there's no specific date or time for each challenge.  They all have to be completed during October and that's about the only rule.  There are 10 Halloween related challenges.  Halloween is my favorite holiday and I've been so looking forward to this October.  It's been a year since I started getting interested in nail art, so I've had all that time to be thinking up some fun and spooky manis!  Here's a list of the prompts:

...more after the jump...