Pages

Showing posts with label Sinful Colors. Show all posts

Monday, May 26, 2014

Pastel Rainbow Gradient


Hello, hello!  Two posts in a row?!  Holy cow, maybe I'm getting back into the swing of things lol  Anyway, I have a pretty pastel manicure to show you all today.  I originally saw a manicure like this over at The Swatchaholic that she did with some Illamasqua pastels and I knew eventually I was going to have to give it a try!


Since I don't own Illamasquas as yet, I did this look with 3 of the colors from NYC's City Bloom collection: Sunset Park Pink, Mimosa Bouquet, and Robin's Egg Blue.  To round out my rainbow, I added China Glaze In a Lily Bit and Sinful Colors Skylark.  I'm absolutely loving how this turned out!  


To create this look, I started with 2 coats of Sinful Colors in Snow Me White as a base since the pastels are quite sheer.  Then I just did the normal gradient procedure (for a great tutorial, check out The Nailasaurus) but flipped the sponge so that the gradient goes from side to side, rather than top to bottom of the nail.  Super easy!

I had wanted to add some sparkle on top of this but, alas, my first sparkle attempt kind of ruined the manicure so I scrapped it.  It was lovely all on its own though!  The City Bloom collection is currently available for $1.99 each.  I found mine at CVS and I believe you can get them at Rite Aid and Kmart as well.  Be sure to double check the display, the one at my CVS had $1 off coupons for any of the polish and makeup in the City Bloom collection.  Screamin' good deal!

Thanks so much for reading!

Sunday, May 25, 2014

Sunday Similarities: Green Jellies, Wet n Wild Contact High & Sinful Colors Irish Green


Hello everyone!  Happy Memorial Day to my U.S. followers!  I want to express my heartfelt thanks to those folks (and their families) who have served in the military.  It's a great sacrifice they've given for this country and I'm grateful to those who give their time, and too often life or limb, to serve and protect.

 I've got a quick Sunday Similarities post for you all today with a couple of bright green jelly polishes.  Whilst strolling through my local Walgreens the other day, I noticed the Wet n Wild Summer 2014 Limited Edition All Access Beauty Megalast display.  They have introduced a rainbow of bright colors for the summer and I picked up a couple including Contact High which, when I got it home, I realized looks a lot like Sinful Colors Irish Green.  I figured a comparison post was in order :)


In the bottle, you can see the obvious similarity.  Both are bright, grassy green jelly polishes.  At first glance, I thought they were exact dupes.
 

But when I applied 4 coats of each, I discovered that Contact High is a few shades darker than Irish Green.  Irish Green also has a bit more yellow to it.  They are very similar in formula, sheerness, and finish (no top coat in these photos).  Contact High is a Limited Edition and Irish Green tends to show up around St. Patrick's Day, so if one or the other isn't available to you, I don't think you HAVE to have both.  But at $1.99 each?  Too good of a deal to pass up!

Thanks so much for reading!

Friday, May 23, 2014

Summer Chevrons Manicure


Hi there!  I hope you are all gearing up for a great weekend!  I've got a quick manicure to show you all today.  I seem to be stuck on chevrons as this is the second mani in a week I've done that includes them.  There's just something about the zig-zaggy pattern that really appeals to me.


I started with 3 coats of Sinful Colors On The Bright Side, a peachy orange creme.  It's actually showing up here more yellow than in real life.  The formula was ok on this, but I did have some difficulty with streakiness so I can't give it full marks.


I used Sinful Colors Snow Me White for the chevrons and you can see my tutorial on creating chevrons with tape here.  They're quick and so easy to do!  China Glaze in Mingle With Kringle rounds out my mani on my middle nail. 

All in all, this is a fun summer look that can be done with any color combination!  Thanks so much for reading!

Friday, May 16, 2014

Drugstore Dime: Sinful Colors Destination Color Sample Set 2

*Nothing to disclose*
 
Happy Friday everyone!  I'm enjoying an unexpected day off.  Since I have some free time, I figured it was a great idea to post the second half of swatches from my Sinful Colors Destination Color haul!  I've got 3 more polishes to show you today and if you missed the first half of the post, you can find it here.  Let's get started shall we?


I'm going to start with my least favorite of the new colors I nabbed.  Green With Ivy is one of the 9 Walgreens exclusive polishes from this set of collections.  I love the name but really dislike pretty much everything else about this polish.  Don't get me wrong, look at the color in the bottle.  Isn't it pretty?  If that was the color that showed up on the nail, I'd be thrilled.  Unfortunately, this polish is so sheer, I'm not sure what you can do with it.
 

Green With Ivy is a teal jelly with holographic hexes and bars.  In these photos, I'm wearing SIX coats!  With the exception of my middle nail, where I started with an undies base of Sinful Colors Snow Me White.  That nail has 4 coats of Green With Ivy over the base.  Even as a layering polish, I'm not sure how you'd use it.  One coat over the white base was barely visible, and it was completely invisible (except for the glitter) on my bare nail.  I'm very disappointed in this polish because I can't find a practical purpose for it.  The formula was fine, it didn't drag or get gloppy but it's just so sheer!
 

I'll be interested to see if any other blogger/nail fanatics come up with a great way to use this polish.  As for me, this one may be going straight to my blog sale :(  The good news is that Sinful Colors is so reasonably priced at $1.99 a bottle, it's hard to get too upset about it.


On to happier reviews!  Yellow Out There is the third Walgreens-exclusive jelly polish.  The bright, lemony yellow jelly base is sprinkled with holographic hexes and bars.  My only real complaint about this polish is that I wish they had been a little more liberal with the glitter.  It's a tad sparse and somewhat difficult to get a good application of it over the whole nail.


Overall though, I like this polish.  The color is perfect for summer and, though it's a bit sheer (4 coats shown here with a bit of visible nail line still showing), it would build up nicely in 2 coats over undies.  The finish on this polish is shiny and I'm showing it without top coat to give you an idea of what it looks like alone.  I had no issues with the formula,  just a nice, smooth application.


A pretty color, a nice formula, and a little sparkle...what more could you want? ;)
 

Curry Up is one of my favorite polishes from this haul.  A bright, limey green creme with flecks of rusty red and a bright turquoise shimmer, Curry Up is another unique color combination.  Another hit with the name as well, I'm always a fan of a good, punny name!


I almost didn't notice the red flecks in the bottle, so I'm pleased they showed up rather well on the nail.  I hesitate to call them glitters as I think they might be actual glass flecks since they don't seem to have a regular shape.  Either way, they're neat-o!  I'm showing 3 coats here with no top coat.  You will most likely be able to get by with 2 coats here, although I still had a bit of streakiness after the second coat...so I went with 3!  Other than that, no application issues to report.
 

I'm going to have purchase a few more of the polishes from this set!  Overall, I'm really happy with the ones I bought and I know there are 3 Walgreens-exclusive textured polishes in the display, as well as 3 "opalescent" toppers exclusive to the store.  Additionally, on the top of the display, there are 4 (I believe) different sets of nail "tattoos" which seem to be just water decals.  They had some cute designs so I may have to grab a couple of those, too! It seems as there's a bit of everything for everybody!

I hope you enjoyed my post and thank you so much for reading!

Tuesday, May 13, 2014

Drugstore Dime: Sinful Colors Destination Color Sample Set 1

*Nothing to disclose*

Hello everyone!  We've finally gotten some warmer weather here in Chicago and I'm loving it!  Although the rest of the week is going to verge on chilly, the past weekend was just gorgeous so I know winter has just about lost its grip on us.  

Whilst strolling through my local Walgreens the other evening, I stumbled upon the new Destination Color Sinful Colors display. This display has all three Summer 2014 collections; Turn Up The Heat, Chill Out, and Simmer Down.  Included in these collections are several new colors, a couple of reruns, and 9 Walgreens exclusive colors.  Now while I would love to have purchased all of these colors to show you, I'm kinda on a budget.  Hence the Drugstore Dime title above ;)  Though Sinful Colors are very affordable at $1.99 each, I narrowed my original selection of 12 polishes down to 6 to share with you all.  I've got 3 to show today and I'll have 3 more later in the week!


First up today is Yellow Spotted, a bright lemony yellow with a lovely shimmer of orange, red, and even some green.  This might have a touch of a scattered holo effect, but I can't swear to it.  I always forget how much I adore yellow polishes until a put a pretty one on...Yellow Spotted definitely fits the bill! 


This polish is so summery and has just the right amount of sparkle...perfect for your hot weather mani or pedi!  Though fairly sheer, Yellow Spotted did build up to mostly opaque in 3 coats (shown here), with just a touch of visible nail line.  As a change, I did not apply a top coat to these polishes so you can see that they all have a shiny finish on their own.  I still recommend a good top coat for durability but if you're just looking for shine, these gals have it!


 I know yellow is not a polish for everyone, skin tones and all, but I'm all for wearing anything you happen to think is pretty.  If you're in the market for a summery yellow polish with an extra kick, give Yellow Spotted a shot.  I don't think you'll be disappointed!


Mimosa was the first polish that caught my eye on the display and is one of the Walgreens exclusive colors.  A O.J.-tinted, yellow orange jelly, Mimosa is super squishy.  Small metallic red hexes and bars float throughout the base and created a lovely depth in the layers of polish.  
 

As with most jellies, Mimosa is fairly sheer.  I'm showing 4 coats with some dabbing at the tips to cover the nail line.  You can certainly layer this over an opaque base polish, but you may loose a bit of the squishiness that jellies give.  It would also be fun to layer this polish over another glitter to mix it up a bit.  I didn't have any formula issues, just make sure to give plenty of dry time between layers to avoid dragging.
 

I know, first a yellow and now an orange?!  What am I thinking?  It's summer, people!  Or hopefully it soon will be...gotta have the warm colors to celebrate!  Mimosa is one of the more unique shades that Sinful Colors has come out with lately and if you're into orange uniqueness, then you should probably snag Mimosa. 


Ok, here's a shade just about everyone can get behind, right?  Mint green...there are so many variations of the classic mint green creme and Mint Tropics might be a nice addition to your collection.  I have about 9 mint polishes, but I always have room for more!  This first photo shows a bit more pastel than Mint Tropics actually is...it has a touch more pistachio in real life.
 

This photo and the next are more true to color, though my camera just had trouble capturing the exact shade.   Mint Tropics was easy to apply and went on smooth.  Any bumps you see are my attempts to cover up smudging, since I'm too impatient to wait to take pics until my polish is dry!  This was fairly sheer on the first coat but nicely opaque in 2-3 coats.  Again, I'm not wearing a top coat here so that shine is all Mint Tropics' own.


After my first set of swatches from these collections, I can already tell I'll be back for more.  Sinful Colors, I just can't quit you!  For the price, you just can't beat their selection and quality.  Have you tried any of these Destination Color polishes yet?  I'd love to hear what you think of them!

Thanks so much for reading!

Wednesday, September 11, 2013

Mish Mash Challenge: Least Expensive Polish


Happy Wednesday, darlings! (Sorry, I'm watching Bedazzled and Elizabeth Hurley is wearing off on me, I guess)  It is, in fact, that fabulous middle day of the week, also known as Hump Day and you know what that means; it's Mish Mash Challenge Day!  I don't mention it every week, but the Mish Mash Challenge is open to anyone who wants to join.  We're a super laid back group and there are a very few rules to follow, so if you're interested, add a comment to this post and Kimber will get you rolling!

On to this week's Challenge.  I took the "Least Expensive Polish" challenge a couple of different ways.  It could mean the least expensive retail-wise polish or it could mean the polish that I personally paid the least amount for.  I kind of combined both of these into my mani for the week.


I started with 2 coats of Sally Hansen's HD Hi-Definition Nail Color in Hue.  This polish has been sitting on my untried shelf for awhile and, since I snagged it in a huge Ulta clearence sale for $0.49, I figured it fit the "least expensive" bill quite nicely.  Hue is a pretty color, a buttery gold with a sparkly gold shimmer.  I never really understood what was so "Hi-Def" about this line from SH.  I've got a couple of them, but they're basically just nice shimmery colors, nothing too effect-y about them.  But pretty, nonetheless!


I decided I wanted to try a new-to-me technique to spice up this manicure a bit.  Fan brush manicures are something I've seen done much more successfully than I've managed here lol  The theory is easy; take a fan brush, dip it in polish and brush it over your nails.  What you don't know until you try, is how difficult it is to get the *right* amount of polish on the brush!  Too much and you just make a mess, too little and it doesn't transfer to the nail at all.  I don't hate it for my first attempt, but it's really not my favorite effect ever.  I used Essie's Saturday Disco Fever (which I won in The Nail Files giveaway a few weeks ago, again fulfilling the "least expensive" challenge) and Sinful Color's Burning Bright (SC polishes are always cheap at Walgreen's and I believe I snagged this one during one of their $0.99 sales). 


Here's a shot of my bottle of Hue, with that lovely clearance sticker on the front.  Marked down from $5.79 to $0.49...pretty good deal!

Please take a run through the other Mish Masher's posts this week.  I can't wait to see what they all come up with!  You can find their posts via the thumbnails below!

Also, don't forget to enter The Nail Files Turned 2! giveaway!  There are 14 great prizes from Taneja’s BrideAccio Lacquer, My Boyfriend Hates MakeupA Polish Playground, Mandie’s Manicures, An Accent NailNail Addicted SistersGalactic Lacquer, Pretty Jelly, xo, noelle and myself :)  Thanks so much for reading!

Tuesday, August 6, 2013

Mish Mash Challenge: Tape Manicure


Hiya!  It's time for our second Mish Mash Challenge...yay!  This week we're doing tape maicures...which is kind of what I did last week.  So, for this week, I decided to go with a technique I haven't already tried and do something with striping tape.  Here's what I came up with!


If you look closely, you can definitely see some smudges and areas where I didn't get the tape stuck down properly, but, on the whole, I think this turned out great for a first attempt (if I do say so myself).


I started with 2 coats of Wet 'n' Wild Megalast in Blue Visionary, one of the polishes in the Wet 'n' Wild Value Packs that you can find in Walgreen's.  If you see this one, grab it!  Seriously gorgeous shade, it leans a little more green than my photos show and it made this mani glow!  I topped BV with one coat of Kleancolor's Chunky Holo Teal just for a bit of sparkle.  After applying a coat of Seche Vite, I let everything dry for a bit.  When there was no tackiness left, I started laying down small pieces of striping tape in different patterns on my nails (tip: tweezers are your best friend for this!).  When everything was laid out the way I wanted, I applied one coat of Sinful Colors' Into The Blue over the nail, tape and all.  While ITB was still wet, I pulled up the tape and voila! Tape manicure!

Please take a few moments to go check out the other fabulous ladies participating in the Mish Mash Challenge!  I'm so excited to see what's shakin' on their pages for this challenge! You can find them via the thumbnails below :)

Oh!  And don't forget to enter my LynBDesigns Giveaway!  I've got a bottle of Am I Ginger? (courtesy of Jenna) up for grabs...trust me, you want it!

Thanks so much for reading!


Tuesday, June 11, 2013

ABC Challenge: W is for Woven Nails


Hi there!  It's a late night here in Chicago and I should totally be in bed, but I just had to get my ABC Challenge post up.  Can you believe it's 'W' this week already??  Only 3 letters left, folks!  'W' was one of the letters I've had planned for awhile (wish I could say the same for 'X'!).  Back in school, I took a few weaving courses and found out that I really enjoyed it.  I even bought myself a tabletop loom after graduation.  I haven't used it in awhile so my skills are a bit rusty, but I hope you'll like what I've come up with for this week's Challenge.  I give you...Woven Nails!


I started with 2 coats of Sinful Colors in Unicorn.  Actually, this manicure started last night when I painted a ziploc bag with 2 large squares of China Glaze in Sunday Funday and Sinful Colors in Island Coral.  Those squares became, after they dried and were cut, the strips of polish I used to create the woven patterns on my accent nails here.  It's similar to what I did for my Viking manicure, only with less detail and more aggravation lol  I had planned to weave the pattern off the nail and then place the whole thing on while Unicorn was still tacky.  However, after a couple of tries, I found that placing the strips directly on my nails and weaving as I went worked better.


After admiring my work, my bf kindly pointed out, "They look prettier than I thought they would...but it took you 2 hours to do 2 nails!"  Oh, boys!  They just don't get it!

Please take the time to check out the other ladies' posts this week.  You can find them via the thumbnails below.  Thanks so much for reading!


Monday, May 27, 2013

Summer Gradient with Nail Pattern Boldness


Howdy, everyone!  I hope you've all had a nice holiday here in the States.  I have a quick, fun manicure for you today.  I actually got this idea from The Polished Perfectionist so I can't say it's original, but I liked the look so much, I knew I had to give it a try! 


I'm loving how this turned out!  I used Sinful Colors in Innocent and Why Not for the gradient and then topped it with Flipping Out Hard by Nail Pattern Boldness.


FOH is a glitter bomb packed with tiny blue, green, and yellow neon matte glitters.  I bought it because I think it looks quite a bit like Floam, which is a total lemming of mine.  When I got the bottle from NPB, I was stumped at how to use it.  I did try to build it up on its own, but didn't have as much success with it as I'd hoped so when I saw The Polished Perfectionist's post, I knew FOH was just perfect for this look!


What do you guys think? 

Thanks so much for reading!

Monday, April 29, 2013

Sinful Colors Diamond Lust Collection


Howdy, everyone!  How was everyone's Monday?  Mine was decent, got some very exciting nail mail to show you all later in the week.  Today's post, however, came about because I was strolling through my not-so-local Walgreen's the other evening and came upon this display:


I couldn't resist, I bought 6!  Shown above from left to right are: Queen of Deco, Crystal Clear, Gemtastic, Scene Stealer, Shine on Me, I Dream in Jewels, Rags to Riches, and Watch It Shine.  The whole collection consists of colorful glitters in clear bases, though the glitters do vary from polish to polish.

I have one whole manicure to show you, featuring my favorite from the collection and then a single nail swatch of the other shades I purchased.  Let's get started, shall we?


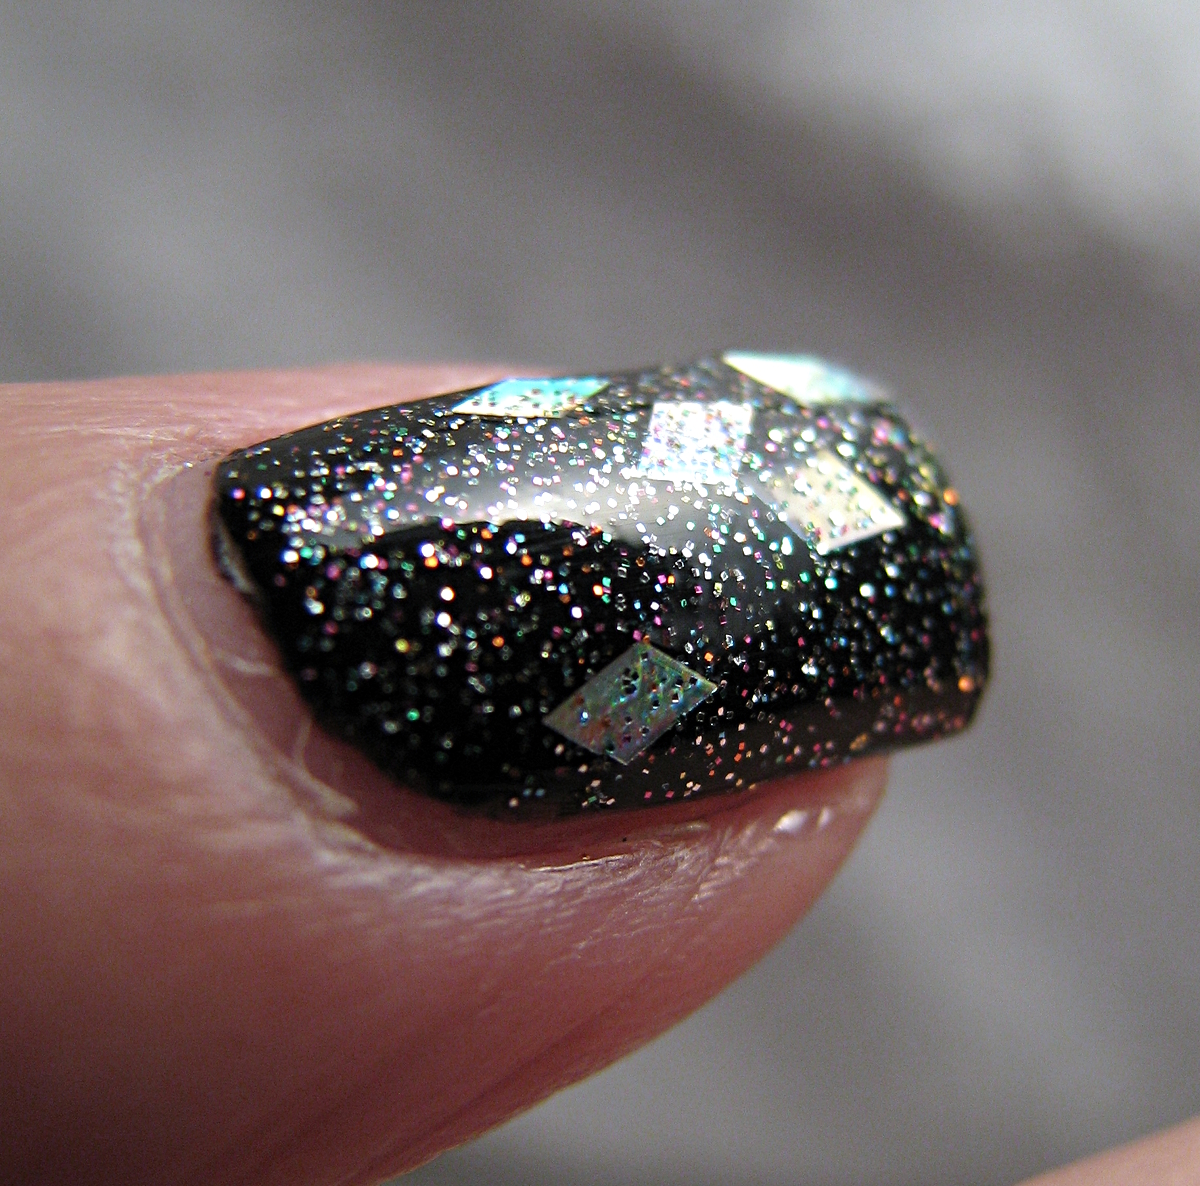
For my full manicure, I've topped 2 coats of China Glaze's Mahogany Magic with 2 coats of SC's I Dream in Jewels.  IDIJ is a gorgeous gold and red micro glitter with larger diamond-shaped holographic glitter in a clear base.  I have to say, on the whole, I'm really pleased with the amount of glitter in this collection.  Most of the polishes had good coverage in 2 coats.  IDIJ is totally packed with glitter and I love the color combo!  My boyfriend said, "Wow!  It looks like the Solid Gold Dancers!" and then proceeded to ask me if I knew who they were lol (note to my younger audience: do not ask me who they are, you'll make me feel old.  That's what they invented Google for!)


I tried my best to get a good macro shot of each polish, I hope you can at least get the idea of what they look like!


 Now on to the rest of the collection!  (All SC Diamond Lust polishes shown in 2 coats)


 Crystal Clear (shown over 2 coats of Deborah Lippmann's Edge of Glory) is chock full of holographic glitters in hexes, diamonds and bars.  I didn't even see the bars until I got it on my nails.  Application was good, although I did have to fish a bit for the diamond glitters.  CC is a real show stopper; super sparkly and very interesting to look at.


 Shine On Me (shown over 2 coats of Wet 'n' Wild's Tickled Pink) contains pink holographic diamond-shaped glitter, pink holographic and fuchsia micro glitter, and larger pink hexes.  The color and glitter are great, but the formula on this one was a little gloppy for me.  Maybe it's just my bottle, but I was less impressed with this one than some of the others in the collection.  The smaller glitter is sparser than IDIJ, for instance, and the diamonds and larger hexes didn't want to spread nicely over my nail.  It's still a lovely polish, but  not my favorite.


Rags To Riches (shown over 3 coats of NYC's Tudor City Teal) is my second favorite of the collection.  It's basically a green version of Shine On Me, with green holographic diamonds and hexes and green and gold micro glitter.   The holographic finish on these glitters really pops!  Application was good on this one and it spread out nicely over my nail.


Scene Stealer (shown over 2 coats of Wet 'n' Wild's Tickled Pink) seems to be the front runner as favorite of the collection judging from the blog posts I've seen so far.  SS has pink holographic diamond-shaped glitters, small pink holographic hexes, and fuchsia micro glitter.  It really is a pretty polish with plenty of sparkle.  Coverage was good in 2 coats and application was great.


Watch It Shine (shown over 2 coats of Deborah Lippmann's Edge of Glory) is the second silver holographic topper of the bunch.  Silver holographic diamonds and silver holographic micro glitter packed into a clear base, WIS is another stunner.  The tiny glitters really look like diamond dust and I can see this one working over a lot of different base colors.  Again, easy application and good coverage in 2 coats.


Sinful Colors Diamond Lust polishes retail for $2.99, which is $1 more than the regular collection.  If you love glitter, these are totally worth it.  I'm excited to have them all in my stash and am hoping to try out a few jelly sandwiches with them soon!

What do you guys think?  Have you purchased any of these yet?  I'd love to hear from you!

Thanks so much for reading!

Tuesday, March 5, 2013

ABC Challenge: I is for Iocaine Powder and Irish Green


Howdy, everyone!  It's Wednesday and that means it's time for another ABC Challenge!  Today's letter is "I".  In my last post, I mentioned I might be using a new polish I got from LynBDesigns, and, not being one to go back on my word, I have! 


I've done another green mani...I didn't realize I did that many of them, but I guess I do lol  Anyway, here I've started with 3 coats of Sinful Colors Irish Green.  I passed IG over for a good long while because I didn't realize that it was a jelly!  Sinful Colors should really change their labeling to indicate what type of polish is in the bottle.  IG is a super bright, super squishy green jelly and it's just perfect for St. Paddy's Day just around the corner!  


On top of IG, I've added a coat of Iocaine Powder from LynBDesigns.  As I'm sure most of you know (and if you don't, you should really watch this movie!), Iocaine Powder comes from the movie The Princess Bride.  It's one of my all-time favorites and when I saw LynBDesigns had a collection inspired by the movie, I knew I had to have it!  IP is a holographic glitter topper bursting with micro-glitters and itty bitty flakies...some super sparkle power here!  As with the other LynB's I've tried, IC had a great formula.  I've used only one coat here on top of the green and you can see how great the sparkle is.


I hope you'll take a few minutes to check out the other ladies doing the ABC Challenge.  You can find them via the thumbnails below.  As always, thanks so much for reading!!