*Born Pretty Store products provided for honest and unbiased review. All other products mentioned were purchased by me.*
Hello there, everyone! You may remember me mentioning how much I love stamping at the moment, so when Born Pretty Store asked me to review some items, I knew right away I wanted to give some stamping items a try!
Whilst perusing their site, which if you haven't been has tons of great nail art items at really reasonable prices, I came across some fun plates. I decide to try out plate QA88 with a pattern they called "Quirky Arabesque". Fitting, no? The swirly patterns and "infinity" style appealed to me right away. (Infinity plates are ones with designs that cover the whole plate so you can stamp anywhere and get an "infinite" number of patterns.) This is a smaller plate at just over 2 inches across so it's a little more limited than, say, the Pueen Encore plates or MoYou's...but it's still a pretty pattern with lots of great looks.

I began this manicure with 3 coats of Sinful Colors Easy Going, a barely there, pink creme. Initially when I saw this plate, I thought it might be good for leadlighting so I wanted to start with a light base to try that out. The stamping polish I used is part of a set from Born Pretty Store and I'll be reviewing that set in a few days. Overall, QA88 is a good plate. I had no issues getting it to stamp and I received it in perfect condition with no scratches or dents. You can see a few spots on the tips of my nails where the pattern "skipped", but that is more likely due to my own stamping skills (or lack thereof; I'm getting better, but not perfect!) or the fact that a few of my nails curve under when they get to a certain length. So that's nothing I can point to as a product issue.

And, as I thought when I saw it, QA88 is great for leadlighting! The pattern is open enough to allow you to fill in the design with whatever colors you choose. I went with a multicolored design created with Zoya's Frida, Wet 'n' Wild's Trippin' on the Boardwalk, Simply Sweet in pink neon, and a random yellow. Kind of has a circus vibe, but I love it!
If you're looking for an inexpensive infinity plate with a fun pattern, this one might just be for you! Plate QA88 retails for $2.09 and shipping is free with non-registered airmail or minimal with airmail tracking (depending on where you live). I always find their shipping to be faster than I think it will be though their site does say it can take up to 20 days for delivery. If you decide to purchase this or any other items from Born Pretty Store, feel free to use my referral code, YFL91, to save yourself 10%!
Thank you so much for reading and I hope you enjoyed the post!
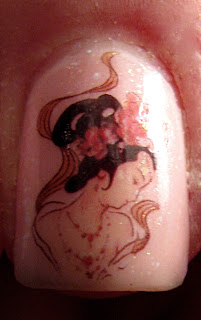
*Gemstone Nail Stickers provided by Born Pretty Store for honest and unbiased review. Shirley Ann Nail Lacquer polish won in a contest and all other products mentioned purchased by me*
Hello everyone! I hope you've all had great weekends. I went apple picking yesterday with my friends and it was so much fun! If you happen to live in the Chicagoland area and are looking for a fun Fall activity with or without children, check out Kuipers Family Farm. Not only do they have a huge orchard to pick apples in, they have a restaurant, a fantastic general store with all sorts of yummy and adorable things, a pumpkin patch and a bunch of activities for kids, including a petting zoo and corn maze :)
Anyway, on to the point of this post! I've got some gemstone nail "stickers" from the Born Pretty Store to review for you today. I'm putting the "stickers" in quotes because they don't actually stick by themselves so I'm not sure that it's the appropriate term for them, but that's how they're listed so let's roll with it lol
I'm going to start off by saying that these gems are not my favorite product from BPS. For starters, most of the gems are quite large. I had a hard time figuring out where they would fit on my nails. The colors and variety are great, but I found it odd that most of the varieties had only 3 stones. If I wanted to use them for a full manicure, instead of just an accent, it would be challenging to say the least.

Not only are the gems large, they're also pretty thick. You can see in the above photo that they stick off the nail quite a bit. I didn't wear these for too long, but I can imagine they'll get caught on things a lot and are probably best just for photos instead of extended wear. I wasn't sure how to apply them, the packaging came with no instructions, so I decided to apply a top coat over my base color, and while it was still wet, place the gem where I wanted it. I then topped the whole mani with more top coat. I would suggest purchasing some nail art glue at Sally's or somewhere if you need a longer wear.

I do want to talk about my base color for a quick minute. This is 3 coats of Tattle Teal by Shirley Ann Nail Lacquer. I was lucky enough to win this polish by naming it :) TT is a pretty minty green teal shimmer. It's quite sheer, at 3 coats I still had a bit of VNL, but I love the color! Cherish, the owner of SANL, has a lovely selection of polish in her shop and they retail for $3.00 and $6.00 for mini and full sized bottles, respectively. Give her shout on Facebook as well!
Back to the gemstone nail stickers. I do think they're an interesting look, just perhaps not for me. The colors are very pretty and they do have the look of real stones. Unfortunately, they aren't the most practical or easy to use. They currently retail on Born Pretty Store for $7.30 for 38 pieces in 12 colors, so it's a good value. If you're interested in these gemstone nail stickers or any other nail art products from BPS, please use my discount code, YFL91. Not only will you save 10% off of your entire order, if at least 10 people use the code, Born Pretty Store will sponsor a giveaway for Over the Top Coat readers!
As always, thanks so much for reading!
*Gemstone Nail Stickers provided by Born Pretty Store for honest and unbiased review. Shirley Anne Nail Lacquer polish won in a contest and all other products mentioned purchased by me*
*Product provided by Born Pretty Store for honest review*
Happy Friday, everyone! I've got a whole lot of nuthin' planned for the weekend (with the exception of brunch with my girls on Sunday), which is just the way I like it! I might manage to get some nail-related things in there, too ;)
Today I have another Born Pretty Store review for you guys, this time with nail art foils. I hope you aren't tired of these reviews yet, cuz these foils are outstanding! Take a look:

I chose to review #21 from this set which has a pretty, bright blue to grass green gradient and a fractal pattern. The foil came in one long strip; 113 cm (44 inches) by 2.5 cm (just under 1 inch). The strip was packaged in a cute little plastic container with a lid. Following the directions on the website, I applied 2 coats of Deborah Lippmann's black Edge of Glory polish as my base. These foils were SO easy to apply. I cut the long strip into smaller pieces about 1.5-2 inches in length and then I used my Ciate nail foil glue rather than leaving my last coat of base polish tacky as suggested, which worked really well. On most of my nails, I was able to get almost ALL of the foil off. This created a cool kind of marbled effect with the base polish peeking through. I topped it all with a coat of Seche Vite to seal in the look.

You can see a bit of the fractal pattern in the macro shot above. I'm really pleased with these foils. It's only my second time using foils of any kind and, so far, I have to say that Born Pretty Store's are much better than the Ciate kit (you can read that post here) I purchased at Marshall's a couple of weeks ago. You do need to be careful when handling the foil, especially if you have wet nail polish on your nails. These will stick very quickly and don't offer a lot of wiggle room to redo a nail. You can reapply foil glue or polish and restick the foil on top of a mistake, but I think they look nicer when you do it all in one go.
*Product provided by Born Pretty Store for honest review*
These foils are $2.99 for the aforementioned 113 cm. strip. Shipping will cost a couple of bucks if you want registered mail. Otherwise, it's free if you want to take the risk of no tracking! And, if you use my code below, you can save 10% off of your total purchase. Pretty sweet deal, huh?
And a quick reminder about my 100+ Trifecta Giveaway. If you haven't entered yet (what are you waiting for??), you have 8 days left! Don't miss out on your chance to win 1 of 6 great prizes!
Thanks so much for reading :)
*Polish provided by Born Pretty Store for honest review*
Good evening, everyone! I've got a Try It On Tuesday post ready to go for you guys. I know, I know it's only Monday, but I'm early for once so I'm gonna ride the wave lol I'm also rolling in a Born Pretty Store review here, cuz I like to multi-task. Hope you guys don't mind! By the way, if you're interested in joining the TIOT crew, all the how-to can be found on Sassy Paints Facebook page.
So today, I've got BPS's Hologram Effect #10 (plus a bit of nail art) to share with you all. I'm sure many of you have seen a few swatches of BPS's holographic polish and know how pretty they are. I knew I had to give at least one a try!
And isn't it a stunner?! #10 (because they really don't have a "name" name for these) is a bright turquoise with a mid to strong linear holographic effect. The holo will, of course, be most prominent in sunlight, but it actually picks up indoor light quite well.
The color is pretty darn spectacular, no? The formula is great as well. I'm wearing 3 coats in these photos but would have been fine with 2. You know me, I like to over-do it :) I'm wearing a coat of Seche Vite in these pics as well and I didn't notice any holo dulling with it at all. #10 is gorgeous all around!
As stated above, I like to over-do things, so I wanted to spice up #10 a bit. Using the chevron tape technique I showed you guys a few posts ago, I added some patterns on my index and ring fingers with butter London's Trustafarian, a light green polish with a more subtle holo effect.
*Polish provided by Born Pretty Store for honest review*
Born Pretty Store's Hologram Effect #10 retails for $5.59 for a 6ml bottle. This is the only slightly disappointing thing about this polish. 6ml is pretty small. The average full size bottle of polish is more like 15ml, so this is about half of that. I don't have an issue with it, as I never seem to wear any single polish enough to run out, but if you're not a crazy stash-er like me, it might be a point to consider when purchasing. I can say that you'll find very little else to be disappointed with #10. She's lovely, applies well and BPS's shipping usually takes less time than estimated. If you do decide to order, please use my Coupon Code to save yourself 10% off your purchase!
Has anyone else tried any of Born Pretty Store's holo polishes? What did you think?
Thanks so much for reading!
*Nothing to disclose.*
Evening everyone! I know most of you are probably out doing fun things with your Saturday night but I have a quick review for you. While checking out Born Pretty Store's $0.99 sale a few weeks ago, I found these fun water decals and, even though they weren't on sale, they were just so pretty I had to give 'em a try!
The set I purchased (G074) contained 15 decals, with 6 different designs. In person, the designs were just as pretty as they looked online, always a good thing!
I used one decal on my thumb and middle fingers. I wanted to do a sort of skittle manicure, so I didn't end up using a decal on each nail. These decals are really easy to use. You trim the design you want to apply from the decal sheet and float it in water for 10-15 seconds. While the decal is soaking, drip a little water onto the nail you're applying the decal to as well. Then (I used tweezers) pick up the wet decal and place it, decal side down, onto the surface of your nail. Press firmly and slide the backing off the decal. On my first try, which is the middle finger on the above photo, I did have a little placement issue, but on the whole I didn't have any issues with these decals.
This shot is my middle finger on my right hand, which came out a lot better than my left so I wanted to show it off a bit :) I am considering purchasing the XF1265 set as well. The designs look the same but seem like they have a bit more contrast, which would be the only problem I had with these designs. The colors didn't come across as dark as I'd hoped.
These decals retail for $2.86 on bornprettystore.com. Shipping might take awhile, depending on where you live, but in my experience, bps usually gets to my door faster than expected. Has anyone else tried these or other decals from bps? What did you think of them?
Thanks so much for reading!
Polishes Used:
Sinful Colors~Tutu, Over It, Song of Spring, Southern Belle, Bombshell, and In the Spotlight
Wet 'n' Wild fastdry~Can-Can You Hang the Mistletoe
****Product supplied for honest review by Born Pretty Store****
Hello and welcome to the weekend! Well, almost. I've managed the day off so I get to start early...woot! I've got a fun little review for you guys today from Born Pretty Store. If you're unfamiliar with BPS, they're an online store that sells tons of great beauty products including nail polish and nail art supplies. Their prices can't be beat and although shipping does take awhile to the States, it's usually worth the wait.
Today I'm reviewing some 3D nail art stickers. This sheet of gold colored nail art stickers includes a few different designs, including stars, hearts, and some pretty scroll patterns. I was pleased upon opening the package to see the variety of designs and had a few ideas straight away on how to use them. For this manicure, I went with a kind of art deco feel by using the little scalloped shapes as a half moon design and adding a larger sticker on my accent nail. I started with 2 coats of Cobalt by Nina Ultra Pro (which I should do a separate post on, cuz it's frickin' gorgeous!) as a base color.
The stickers were easy to peel off the plastic backing using tweezers and they were easy to place on the nail. The instructions on the packaging recommend applying base color, letting it dry, placing the stickers and then adding at least 2 coats of top coat to seal the design in. I did follow those instructions for this manicure, but I'd suggest a little change for future use.

With the suggested method, I found the edges of the stickers kept wanting to curl up, even with 2 coats of Seche Vite. After some experimenting, I found if you apply the stickers when your base color is still a bit tacky, the sticker edges adhere better and the end result looks nicer. You could also let the base color dry and then apply one coat of top coat and then adding the sticker while that coat is still tacky. After 2 coats of top coat with either of those methods, I was much happier with the outcome. Placement is a little trickier with these methods, you won't be able to move the stickers without smudging your base coat, but that still beats the edges of the stickers getting caught on clothing all day long!
****Product supplied for honest review by Born Pretty Store****
Overall, I liked these stickers. I love the variety of designs and how they look on the nail. They retail for about $5 and, though I probably wouldn't purchase them by themselves, if I had an order going I'd definitely throw them in my cart!
If you're interested in purchasing these or any other products from Born Pretty Store, feel free to use my code YFL91 to save 10%!
Thanks for reading!


